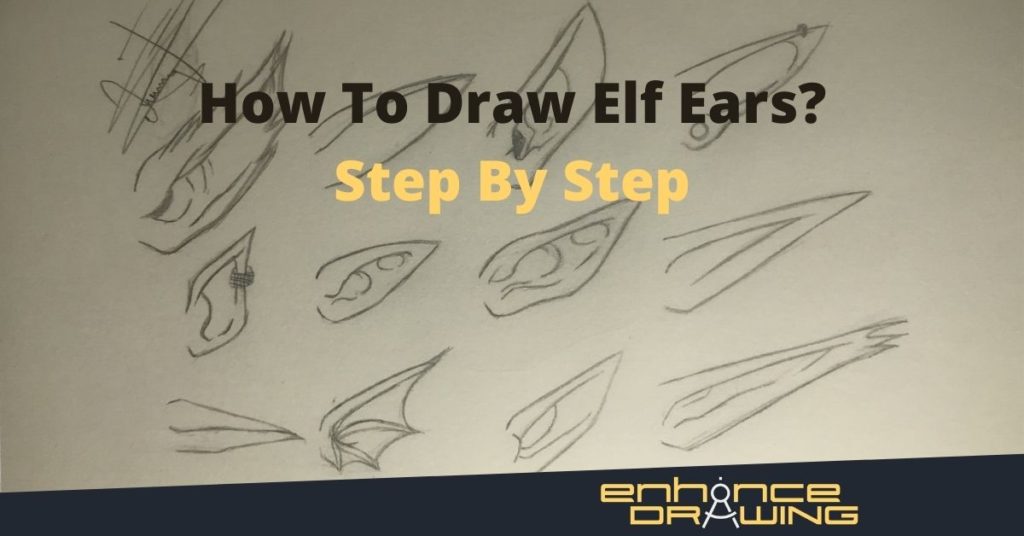
If you’re a fantasy fan, you have probably wanted to draw elf ears. In this drawing tutorial, I will guide you through 12 different elf ears styles and how to draw them step by step. Once you learn to draw all styles, you will most probably be able to create your own, as all elf ears have very similar shapes and structures.
So how do you draw elf ears? To draw elf ears, the artist needs to keep these three main aspects in mind: elf ears need to have pointy edges, elongated shapes, and resemble ears. Since elves are fictional beings, there are no strict rules to draw their ears, and you can illustrate them in many ways.
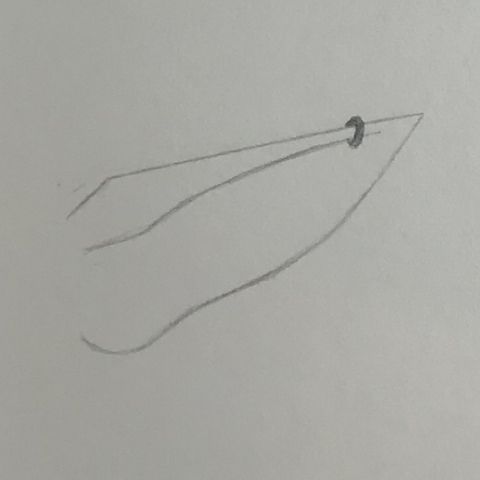
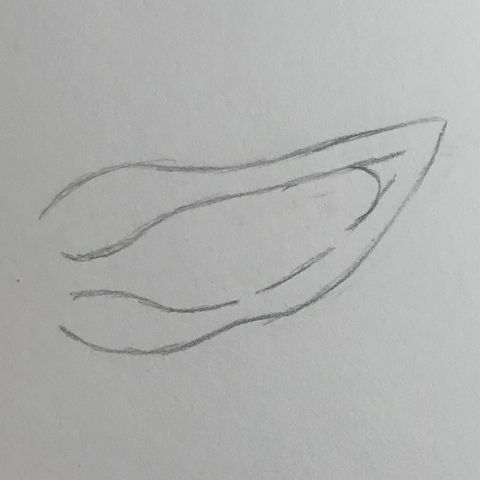
The step-by-step tutorials you will find in this post will be for the elf ears of the image above.
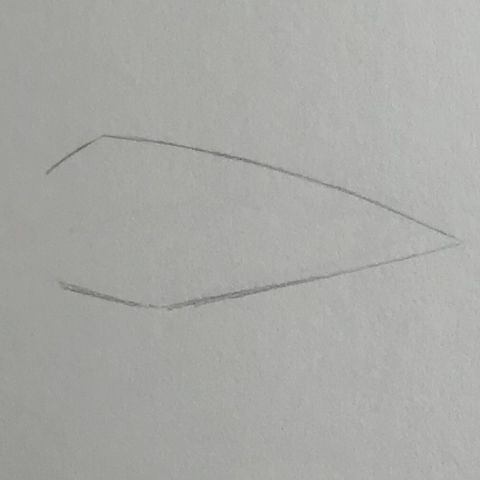
Without getting ahead of ourselves, let’s start with simple, pointed elf ears.
1- How To Draw Simple Elf Ears
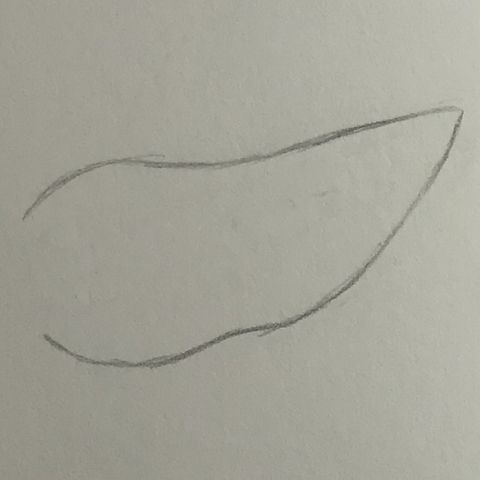
To start getting familiarized with elf ears, the first style we will draw will be pretty simple and consists of 3 steps.
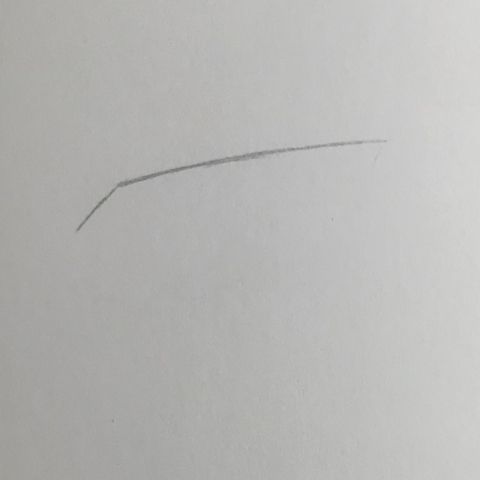
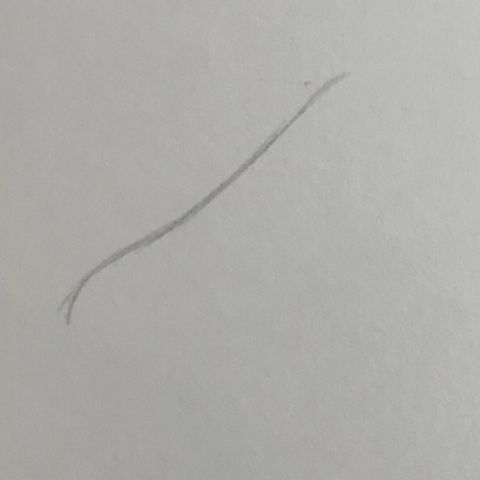
Step 1
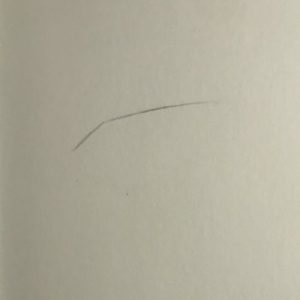
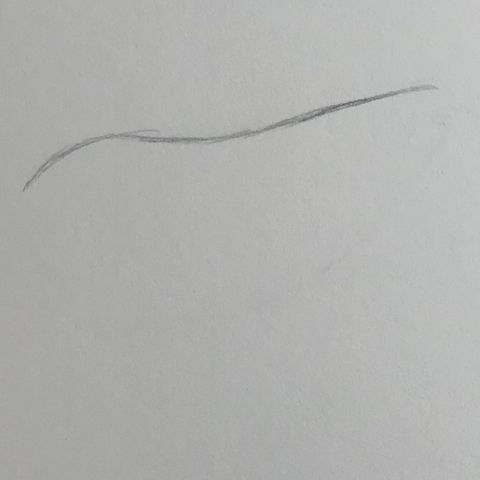
Draw one short line at a 40-45 degree angle for the first stroke, and then draw a more extensive line (approx. 2.5 times larger than the short one) at a 5-10 degree angle for the second stroke. Take note that the second line has a small curvature.
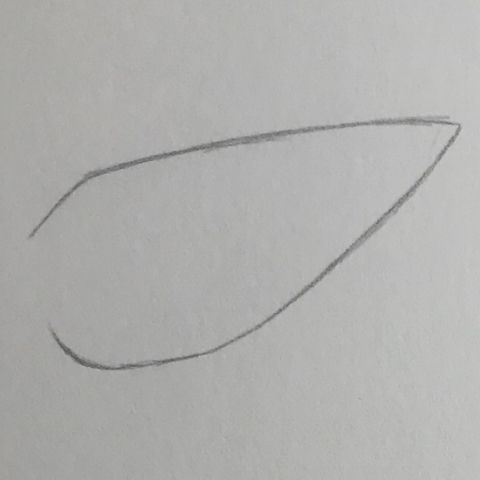
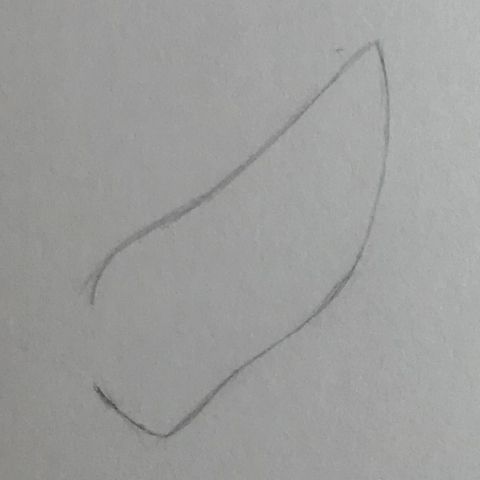
Step 2
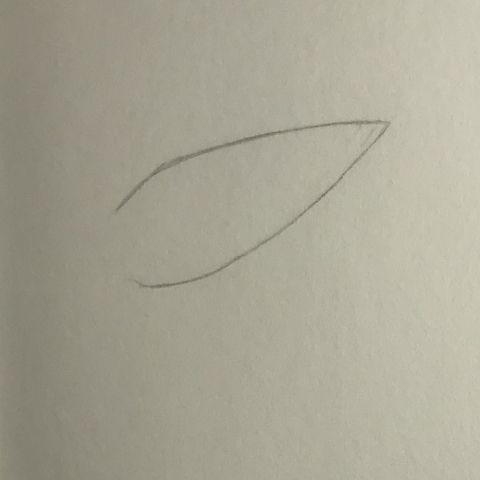
Repeat the same process you followed at step 1, except the aperture and curvature will be opposite compared to the first line. Here you already have a reference line, so you can mark where you want the line to end before going for the stroke. That way, it will be easier to take the line where you want it to go. If it looks like a leaf, then you’re doing it right.
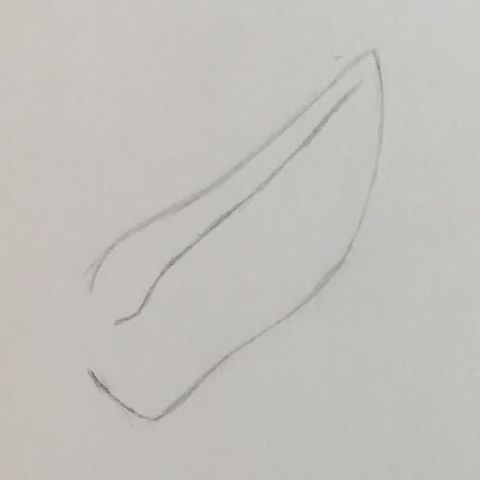
Step 3
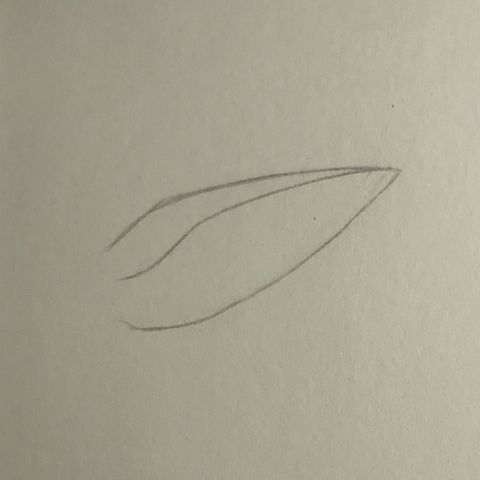
Draw a line that is a little closer to the top line than to the bottom one. Take note the line has two curvatures. The first curvature gets closer to the top line quickly, and the second one changes the angle to approach the line slower. Also, notice that the line doesn’t end at the edge but a little bit before it. And that’s it! Three lines are enough to draw a simple elf ear.
Let’s now draw the next elf ear style.
2- How To Draw Anime Elf Ears
Honestly, you can use all of the ear styles shown here for your manga characters. However, I’ve seen these anime-style elf ears in many shows, so here’s a quick three steps to draw them.
Step 1

Draw a short line similar to the one in the previous style, then draw a line going down. The second stroke has more or less the opposite angle the last ear has, but it is slightly more inclined.
Step 2
Mark where you want your line to start and end, and then draw the curvatures making sure the final result is a leaf-like figure. Take note you have to break the line in two.
Step 3
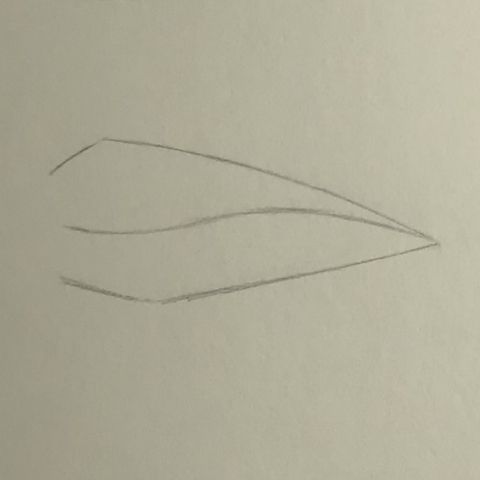
Similar to the previous ear style in this exact step, we’re going to create an “s” like curvature. The main differences here are that the space between the top line and the curvature is more significant, and the line finishes at the ear’s edge. That would be it for the second style!
Let’s go for the next style!
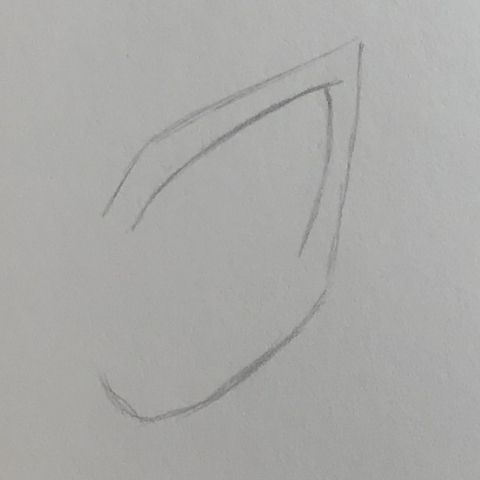
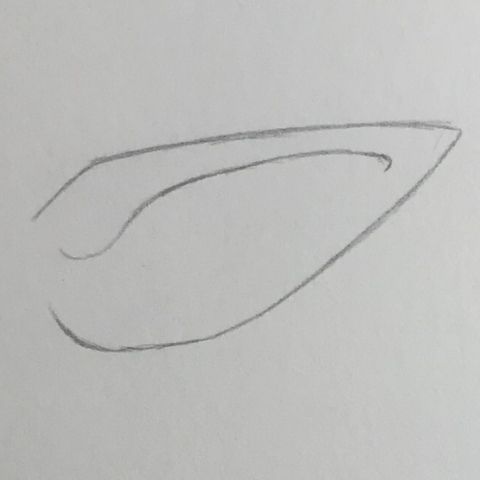
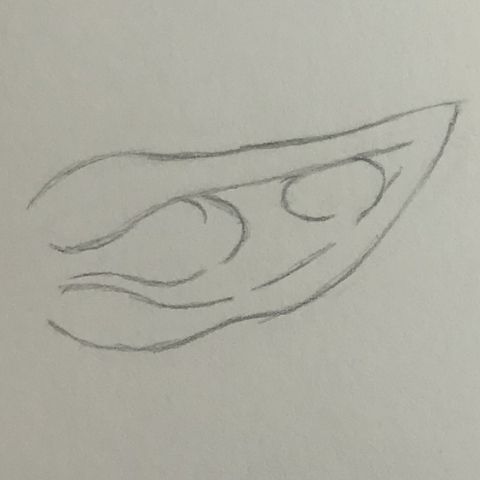
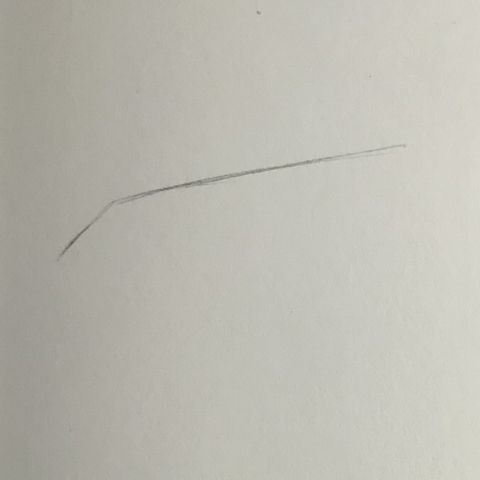
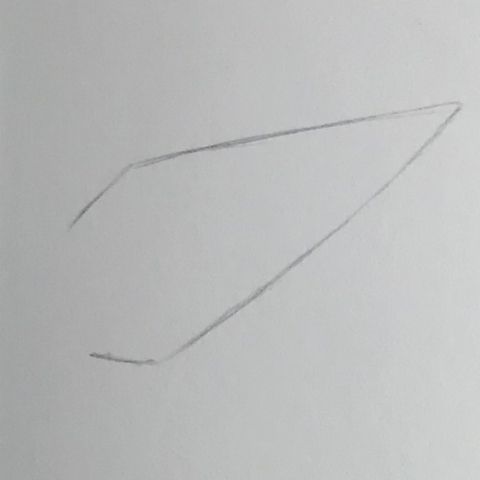
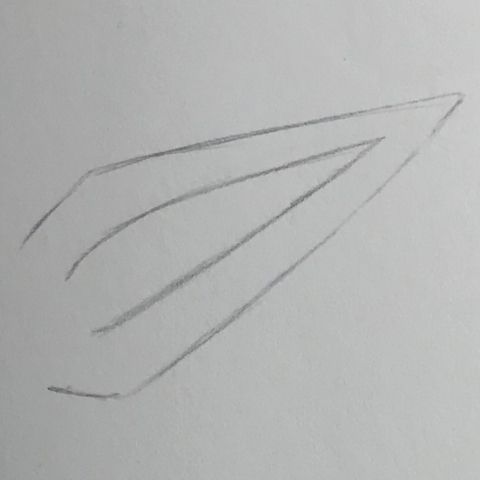
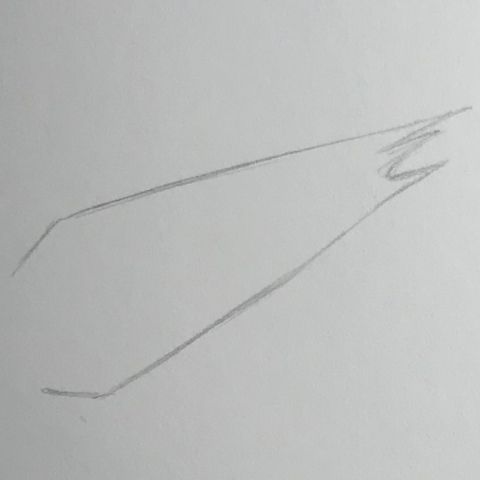
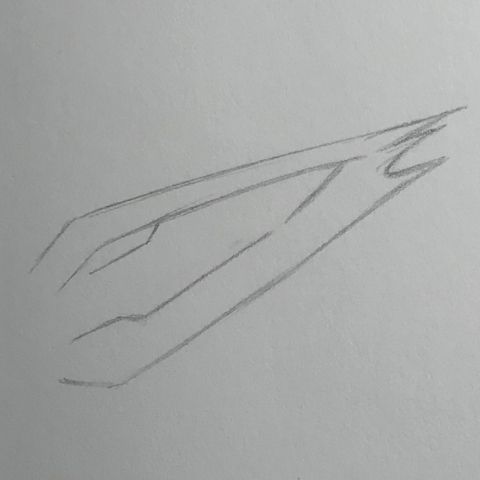
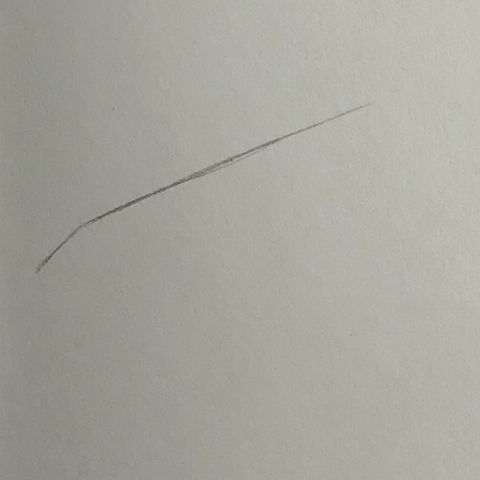
3- How To Draw Regular Elf Ears
For this next style, we will add more detail to the first exercise we did and increase the level a bit. This new elf ear style will consist of four steps.
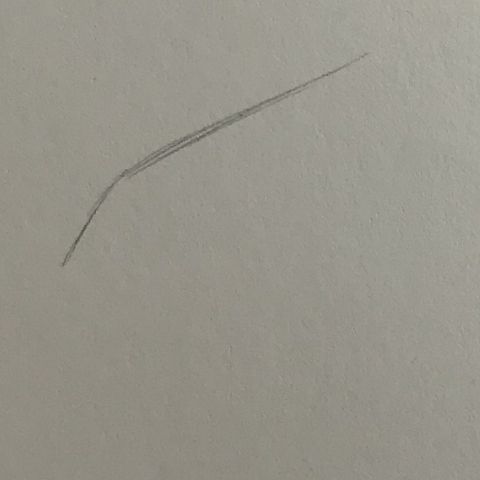
Step 1
Draw a short, straight 40-45 degrees angle line, and then a 5-10 degrees angle straight line that is 4-5 times larger than the short line. The difference from style #1 is that we’re not adding any curvature to these first two strokes.
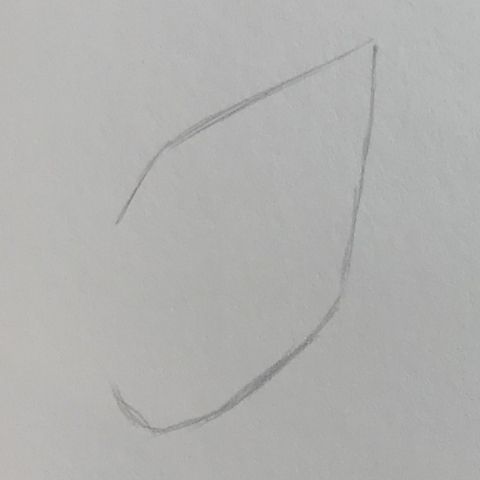
Step 2
Applying what you practice in previous exercises, draw an “s” like curve for the second line. Note that the line has four different angles depending on where you’re looking at it.
Step 3
Draw a line very similar to the one below it and finish it in a circular curve. Notice that this line doesn’t start at the same place the others do; it is more inside in the ear. Make sure you draw this line close to the one below it. Add another earring in any style you prefer to make it look unique.
Step 4
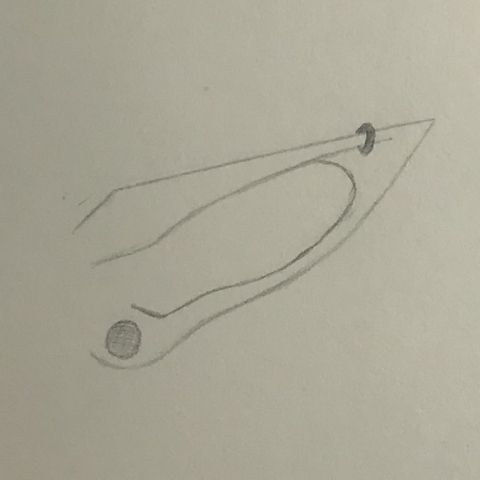
Draw a line very similar to the one below it and finish it in a circular curve. Notice that this line doesn’t start at the same place the others do; it is more inside in the ear. Make sure you draw this line close to the one below it. Add another earring in any style you prefer to make it look unique.
Nothing can stop you now! Let’s go for the next style.
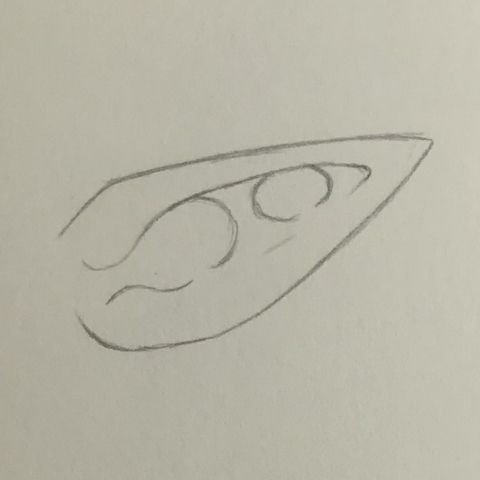
4- How To Draw Half-Elf Ears
To draw half-elf ears, you need to find an intermediate point between how short are human ears and how long are elf ears. We’ll draw it in four easy steps.
Step 1
First, draw a line similar to the previous exercises, except that this one will be shorter. The short line’s angle is 45-40 degrees approx. The other one has an angle of approx. 25-30 degrees.
Step 2
Leave a slightly bigger space between the starting lines and give form to your ear. The final ear will have a diamond or leaf shape look.
Step 3
Following the reference lines you have, draw two lines that remain close to the other ones to create a sense of volume. Note that the second line starts to appear before the edge of the first one.
Step 4
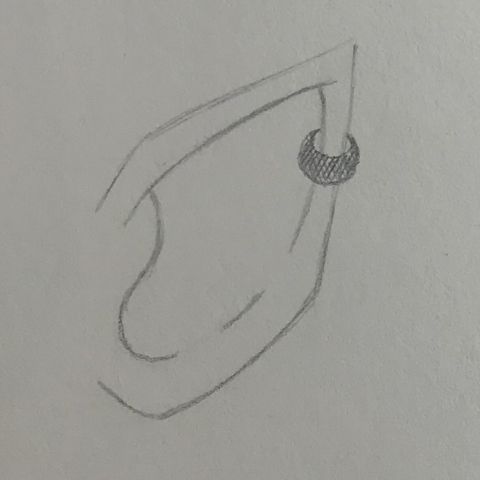
Now draw the “s” like curve you’ve been practicing and draw a short line that connects the two lines. You can add an earring if you’d like. And there you have it!
You made that seem easy! Let’s see the next style.
5- How To Draw Kid Elf Ears
To illustrate this style, we will first draw a kid elf ear and then draw an adult’s elf ear using the same style to see how they look compared to each other.
Step 1
Just as we did in past exercises, draw a straight, short 40-45 degree line and then draw a 5-10 degree slightly curved line.
Step 2
Now we want our ear shape to look like a leaf. Again, draw a curved line connecting the edges and give form to your ear.
Step 3
Now we will again draw an “s” like curve for the ear’s detail. We start drawing it outwards and then change its direction inwards. Notice this line ends on a “u” curve.
Step 4
Now we will start drawing from bottom left to top right. First, draw an “s” like curve symmetrical to the one on top of it. Then draw a semi-circle that tries to connect the two lines. Then draw an unfinished oval smaller than the previous one and draw a short line between them that encloses all these details.
You’re now drawing more detailed elf ears! Let’s keep increasing the difficulty.
6- How To Draw Adult Elf Ears
Using the same style we used for the baby’s elf ears, we will draw how adults’ elf ears would look compared.
Step 1
Notice the shape changes a bit compared to other styles. Draw a line starting with an outwards curve, then inwards, then outwards again, and finish it with a little inward curve.
Step 2
The process will be pretty similar to the previous one. Start by drawing an outwards curve, then inwards, then outwards for a bit, and then finish the line with an inwards curve that connects the edges.
Step 3
This step will be a bit simpler. The top line starts with a short curve going down and then upwards to finish it on a somewhat straight line without touching the borders. The line below it begins with a turn going down and ends with a long line going up. Notice these two lines don’t touch each other and that there is a semi-circle connecting them.
Step 4
For the final step, draw a line that follows the contour of the one below it and forms an unfinished oval. Then draw a semi-circle that connects the line you just did and a small curve inside the incomplete oval. For the final touch, draw a semi-circle that doesn’t connect with the top’s semi-circle.
You’re holding up good! The next three styles will be rather simple, and the last three ones will be more difficult.
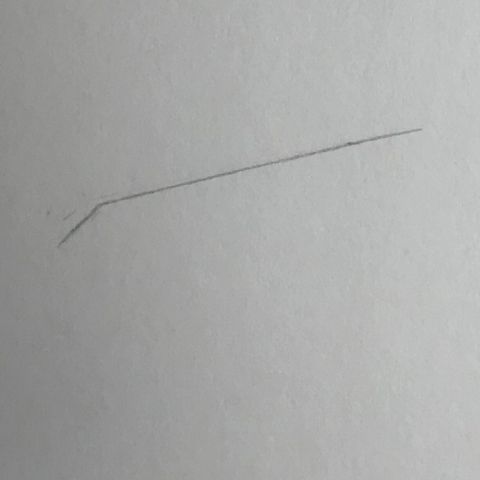
7- How To Draw Simple Pointy Elf Ears
Let’s now see how elf ears look like if we only use straight lines.
Step 1
As in previous exercises, start a short diagonal, straight line and then draw a three times longer, less inclined line.
Step 2
Draw a short line using an angle similar to the long line on top and then a long straight line connecting both edges.
Step 3
Replicate steps 1 and 2 on a smaller scale inside the ear. The final result should be a leaf-like figure with a smaller leaf inside.
That was easy! Let’s now add more detail to this same style.
8- How To Draw Detailed Pointy Ears
To make your elf ears look unique, we will add some extra details. Again, using straight lines only.
Step 1

Draw a short diagonal line and then draw a less inclined line that is 3.5 times longer than the short one. Once you finish that, add three pointy peaks to the ear.
Step 2
Draw a short diagonal line going down, and then a long line going up connecting both ends. Remember the leaf reference. If it looks like it resembles a leaf, then it is well drawn.
Step 3
For the ear’s details, draw a line equal to the top line but on a smaller scale. Notice this line doesn’t end touching any borders and that it has a detail at the beginning. For the line below the one you just drew, we will use four strokes. The first one is a short 30-35 degree angle line. The second one is a very short stroke going down. The third stroke is a long 40-45 degree angle line, and the fourth stroke is a 50-55 degree angle stroke that is not connected to the last line.
That was hard to explain! But you’ll get what I mean by using the example images. Let’s go to the next exercise.
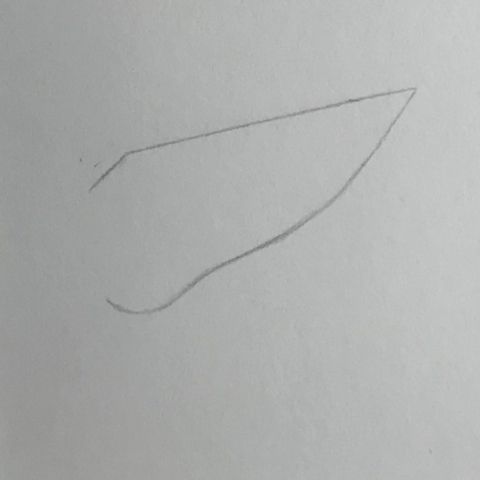
9- How To Draw Squared-Pointy Elf Ears
For this exercise, we will change the elongated form of elf ears to a more squared one. You can use this style to represent a half-elf ear.
Step 1
Draw a short diagonal line and a longer, less inclined line to finish the stroke.
Step 2
Here, you’ll draw the next line in three different strokes. The first one is a short diagonal line going down. Then a longer diagonal line going up, and finally, a much steeper line to connect the edges.
Step 3
For the details, we will first draw two short, diagonal lines opposite from each other. After that, draw two slightly curved, long lines that start from near the edges of the short lines you just drew. And finally, draw a semioval to add extra detail to the ear.
Now, the next three steps are going to be more complicated. We will draw dragon elf ears, vampire elf ears, and wolf elf ears.
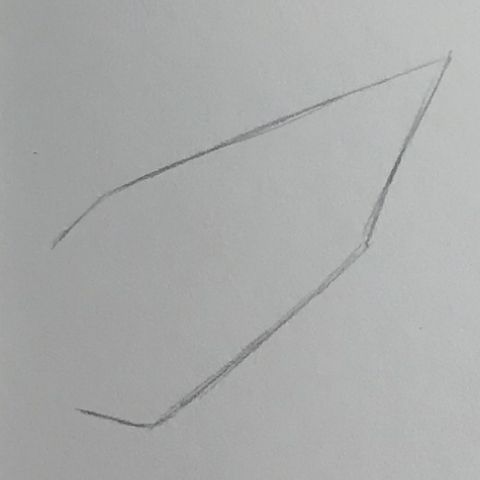
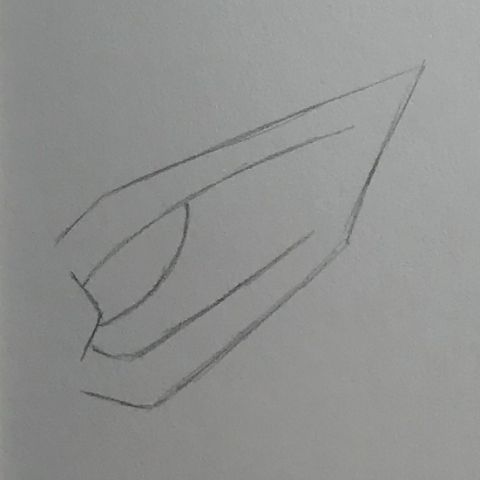
10- How To Draw Dragon Elf Ears
Time to level up the game and get more creative! Now that you know the basics of drawing elf ears, we can create our own versions. Let’s draw dragon elf ears in three steps.
Step 1

First, draw a short, upwards curve. Then start making the curve go down a little bit before fully making it go upwards again and finish the stroke.
Step 2
Draw a series of elliptic curves, each smaller than the next one, starting from top to bottom. The curves shouldn’t be too deep inside the ear.
Step 3
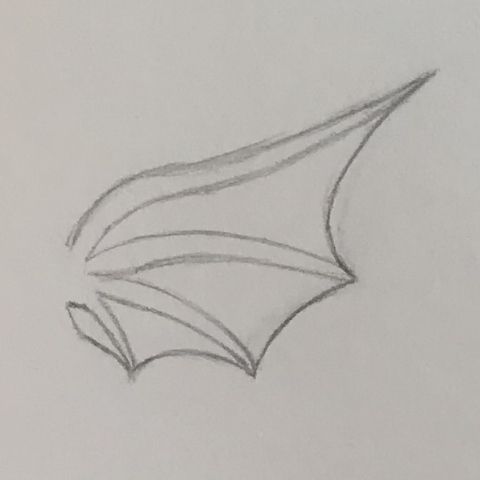
Now, to give it that dragon-like look, we will add some phalanges to the ear. To do so, draw curved lines that connect to each edge. Notice that just as with every elliptic curve, each phalange is longer than the next one (from top to bottom).
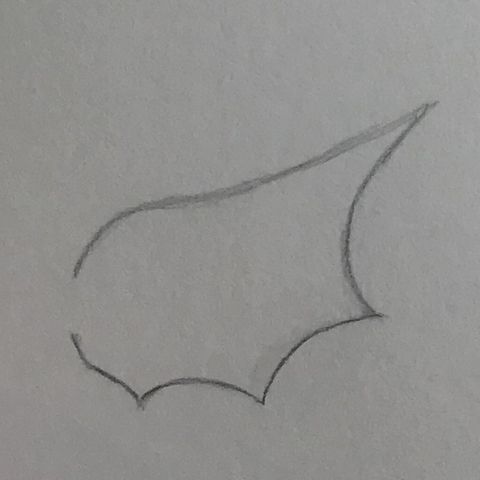
Let’s now see how a vampire elf ear would look and how to draw it!
11 – How To Draw Vampire Elf Ears
There are no limits in art or fantasy. In this 4-step tutorial, I will show you how to draw vampire elf ears. If you don’t have much experience drawing, I recommend practicing with previous exercises to get used to the basic shapes.
Step 1
The first step would be to draw a steep, curved line and then continue to draw the curve at an upward angle, ending the stroke with a slight curve. Notice the first curve goes in this direction: “(“. And then it switches to this direction to go upwards “)”. At more flattened angles, of course.
Step 2
Starting from top to bottom, draw a long curve like this “)”. Next, reverse the curve and make it look more like this “(” until you get to the edge where you want the line to end. Then from the bottom up, draw a curve like this “(” at an angle of -45 degrees to finish the shape.
Step 3
Starting from bottom to top, draw a short, straight line at a 15-degree angle and then a long line following the contour of the line on top of it. The one you drew in step 1.
Step 4
Let’s now add the rest of the details. Starting from bottom to top, draw a line that looks like an elongated w. A short, straight line going down, then up, then down, and finish it with a long straight line going up. Then unite the top and bottom lines with a curved “>”. The next two lines are elongated s-like lines, and the third one is more like a “)”. And there you have it! A nice-looking vampire elf ear in 4 steps.
If you made it through here, you’ve got to give the wolf elf ear a try. Let’s go for it.
12 – How To Draw Wolf Elf Ears
This ear style is my favorite! It’s a bit more complicated, but I think you’ll be able to draw it. Follow the five steps below to do it!
Step 1
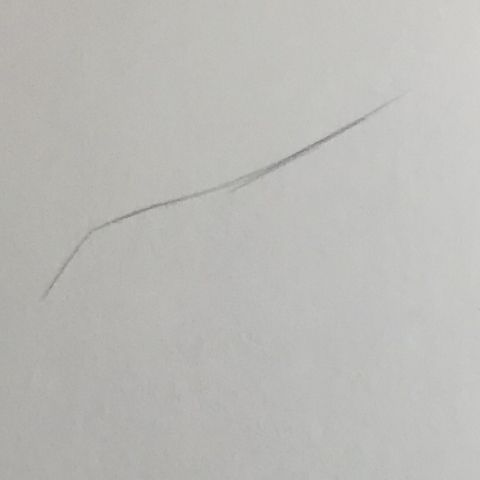
We will start by drawing a quick shape sketch. Don’t draw lines too hard here, or you won’t be able to erase them in step 4. Draw a short, straight, 50-degree angle line. Then, continue the stroke with a curve going slightly up and quickly flatten it, so it ends with a turn like this “)”.
Step 2
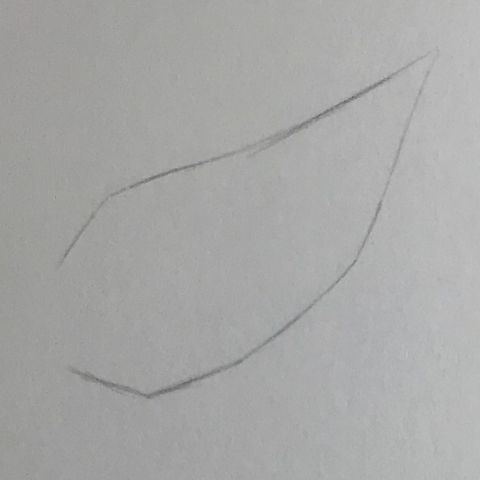
From top to bottom, draw a long, curved line that looks like an “)”. Once you end the line, draw a short straight line going upwards in the opposite direction. Again, don’t stroke lines too hard here.
Step 3
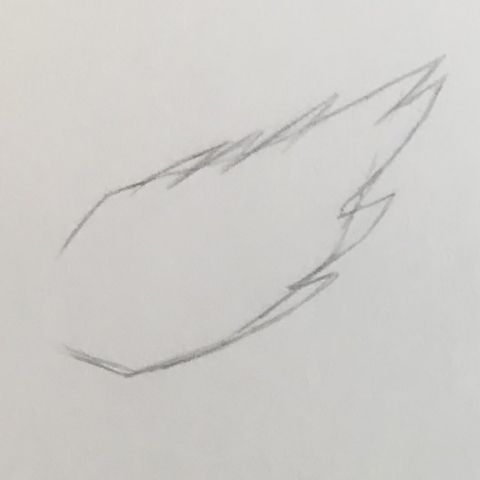
Now that you have the ear’s shape, start adding hair spikes across the ear like shown in the reference image. Notice every hair spike follows the ear’s contour.
Step 4
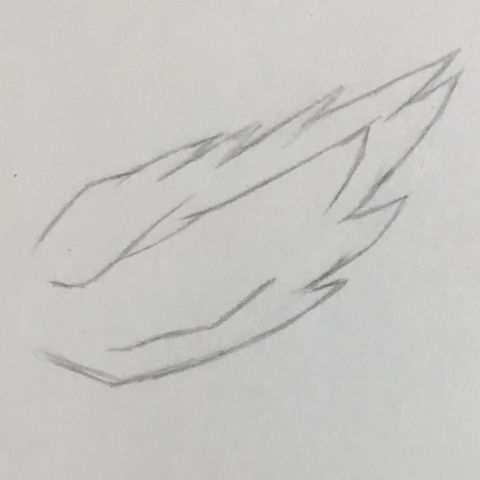
Once you have drawn the spikes, it’s time to erase the reference lines we did in steps 1 and 2. Now, add volume to the ear by adding short strokes that follow the ears contour. You play with the line angles or follow the ones in the reference.
Step 5
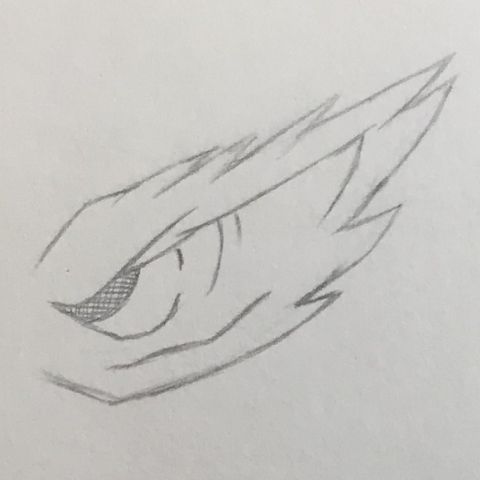
From left to right, draw a short, straight, 125-130 degree angle line and curve it upwards until you hit the border. Now, starting from the inside of the area you just drew, draw four curved lines like this: “)” using angles that follow the ear’s contour like shown in the reference image.
And there you have it! You have completed all elf ears styles. Use everything you learned here to experiment and create new styles.
Happy drawing!