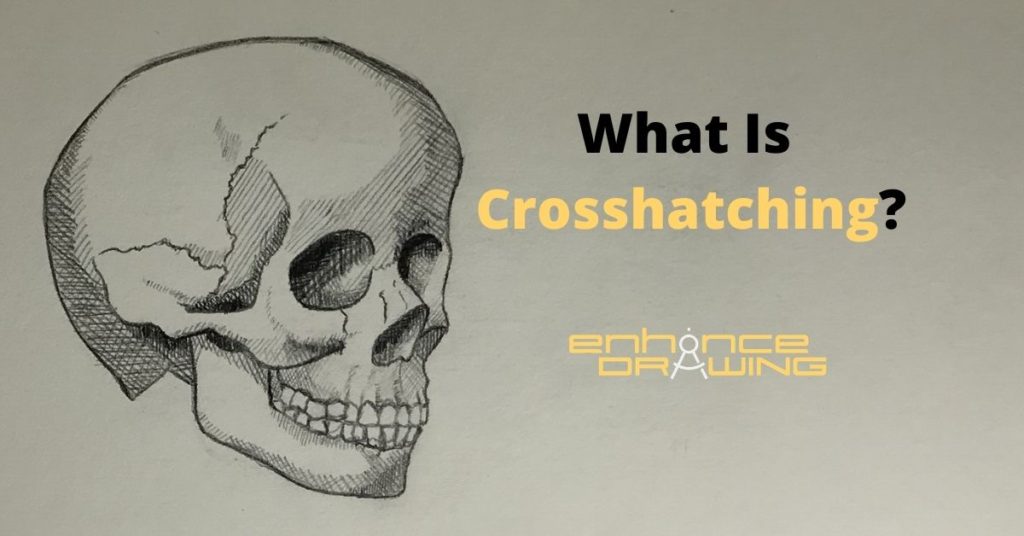
Talking about our favorite drawing techniques to fellow artists, we spoke about crosshatching and chatted about it for a while. Crosshatching can make your drawings look so unique I think every artist should do it at least once! So what is crosshatching?
Crosshatching is a linear artistic technique that consists of drawing crossed and parallel lines close to each other to create an illusion of form, value, texture, and light. The closer the lines are to each other, the more pronounced the illusion is, and vice versa.
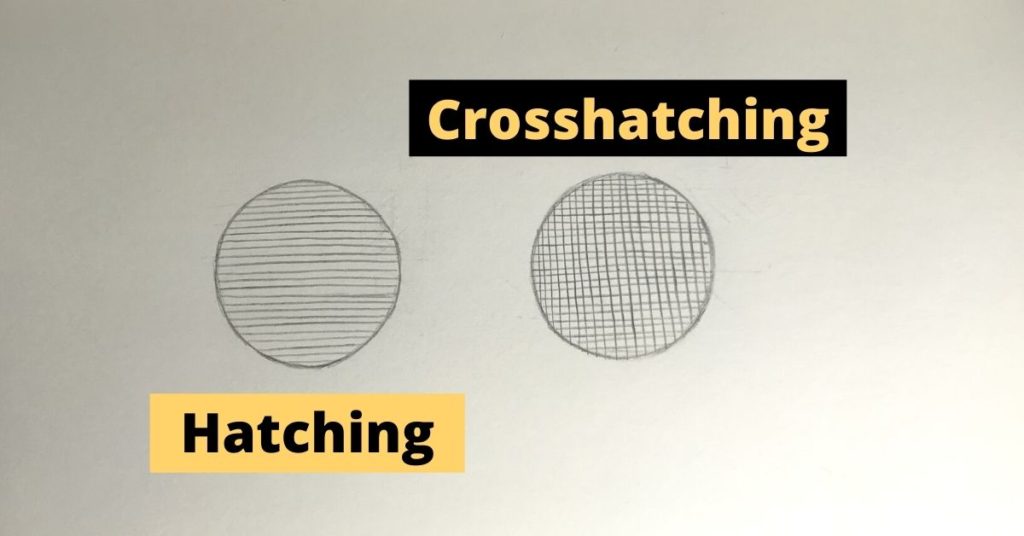
See examples of how crosshatching looks below! Rather than reflecting light or giving form to your drawings using traditional shading techniques, learning to crosshatch will make you a much more complete artist.
What Is Crosshatching & Examples Of How It Looks Like
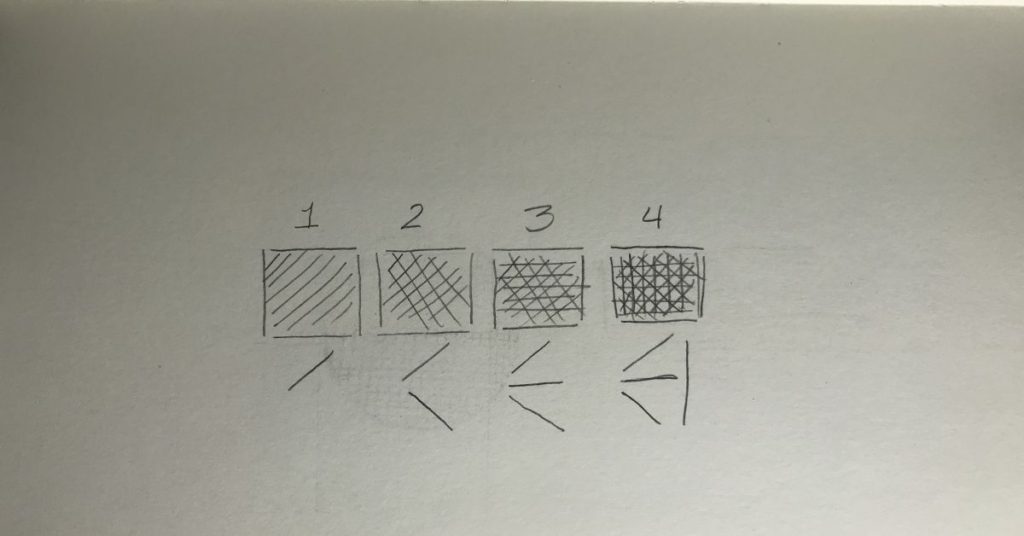
Crosshatching is a technique that uses the quantity, thickness, and spacing of the lines to create bright or dark areas. The minimum number of lines for the technique to be considered crosshatching requires at least two parallel lines in different angles. Depending on how dark or pronounced you want your drawings to be, you can add as many more lines as you’d like. We don’t count each line, but rather the angle you drew it. See the image below to understand the concept.
To simplify its concept, I will show you examples of every crosshatching aspect. Once you see each aspect, I will then explain how you can apply it to your art!
1. Value
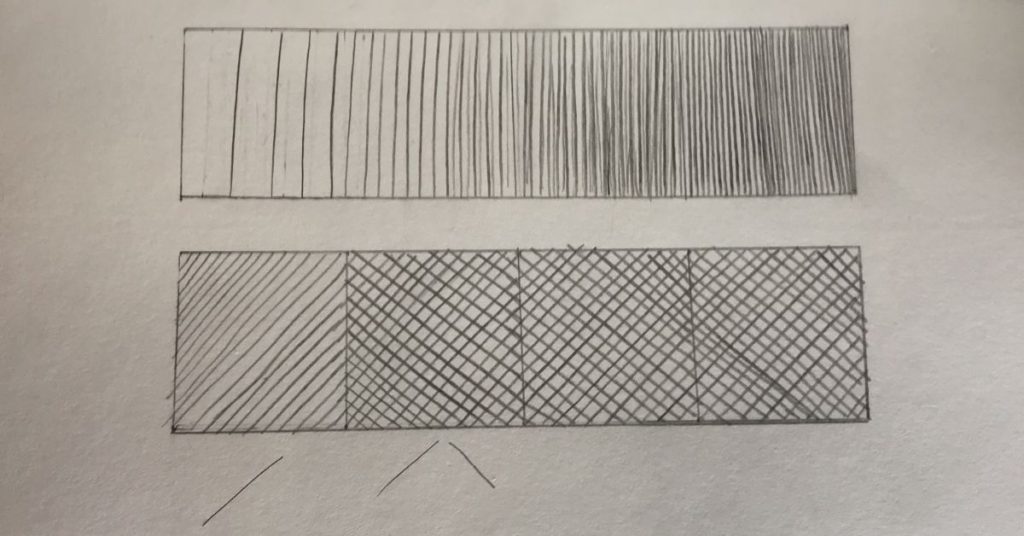
As we said above, what you want to accomplish by applying the crosshatching technique to your drawings is to create different types of illusions in them, just as traditional shading could achieve too. With traditional shading, you control how dark an area looks by mainly applying less or more force to your pencil strokes, but with crosshatching, you mainly control it by how close you draw lines from each other. Here’s an example of how the two techniques, hatching and crosshatching, control value (how dark or light an area is) compared to each other:
2. Form
Up to this point, we have only used straight lines to illustrate crosshatching, but you can use all types of lines: curvy, short, long, etc. Drawing different lines open new uses to your crosshatches and allow you to create various illusions of form. See an example below.
As you can see, you can create an illusion of form using straight lines only, but if you use lines that follow the shape of the object, you can improve how it looks. I recommend using lines that follow the object’s direction, but your imagination is the limit here!
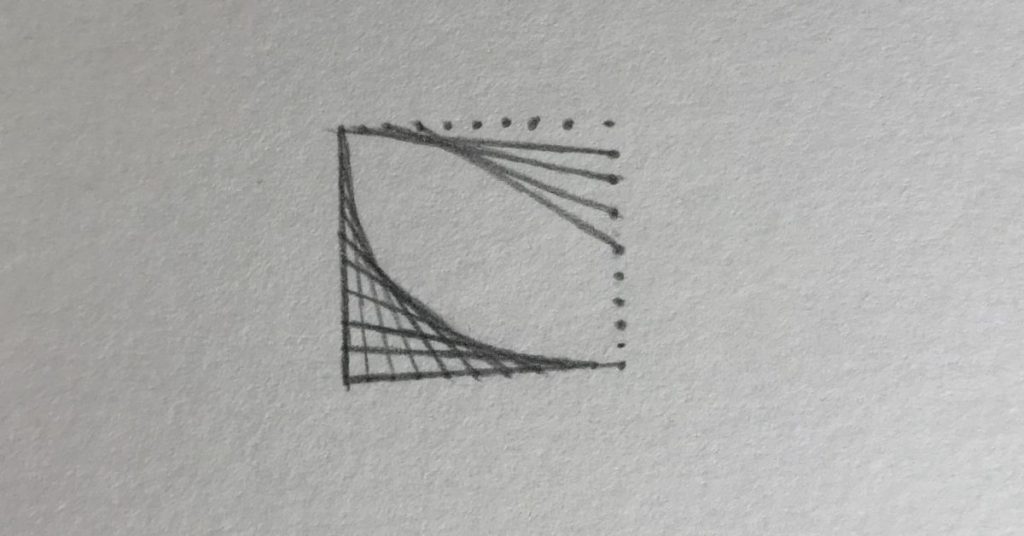
Below is one of my favorite 3D forms you can create using only straight lines! It is a great exercise for practicing drawing straight lines.
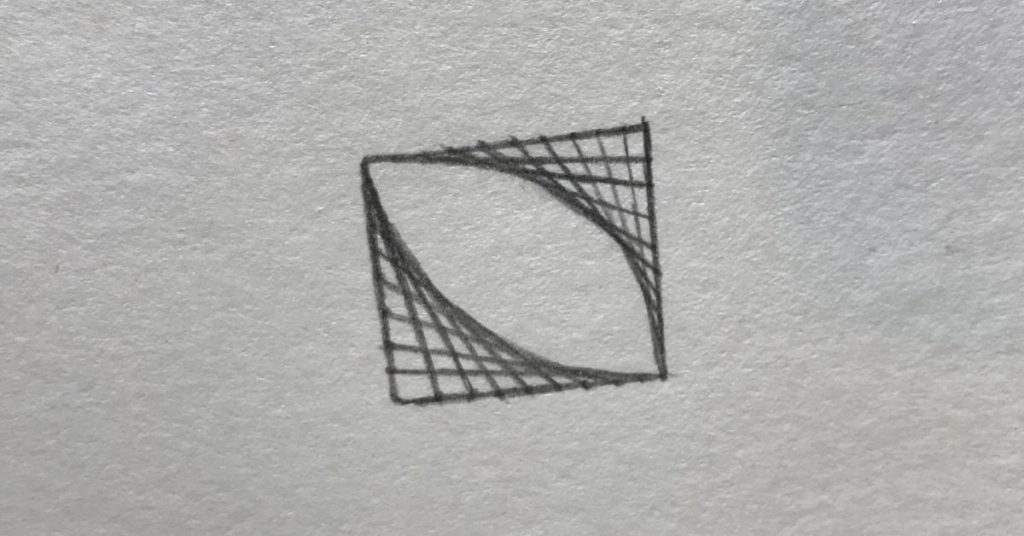
To replicate it, you need to draw 10 horizontal dots and 10 vertical dots like shown below. Once you have that done, connect the 1st horizontal dot to the 10th vertical dot, then the 2nd horizontal dot to the 9th vertical dot, and so on.
3. Texture
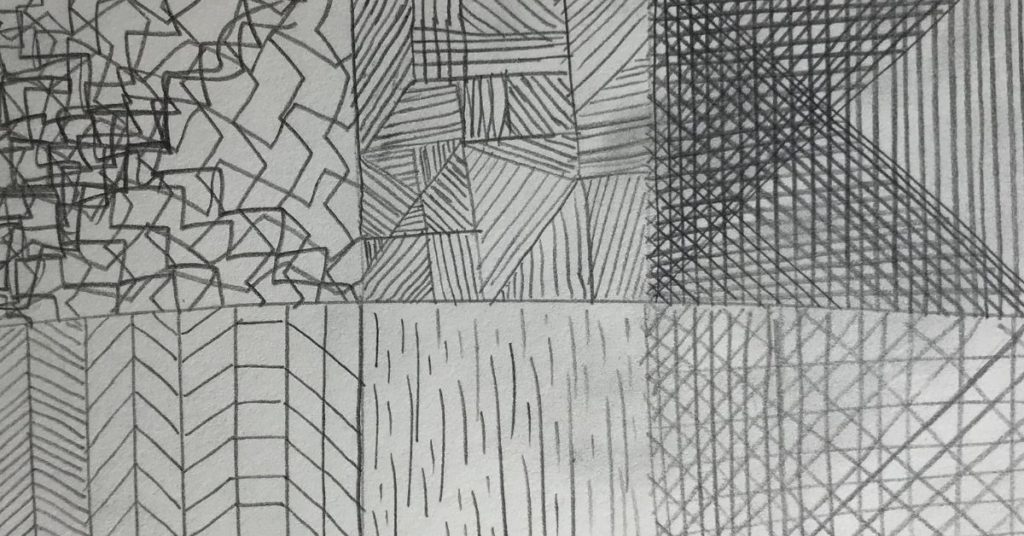
And apart from everything else, crosshatching can also add textures to your drawings. Because there are no strict rules about how you should draw lines for crosshatching, you can use lines in any way you’d like. In fact, the more different you draw your lines, the more unique your drawings will look. See an example of different textures.
Now you know the concepts, so how does crosshatching look on an actual drawing?
As you can see, I used hatching and crosshatching together since that’s one of the best ways to achieve greater tone scales.
Crosshatching Technique Exercises
If you want to draw using the crosshatching technique, you first have to understand its concept. To do this, I will explain how to create each of the examples above and the theory behind them.
1. How to create value with crosshatching
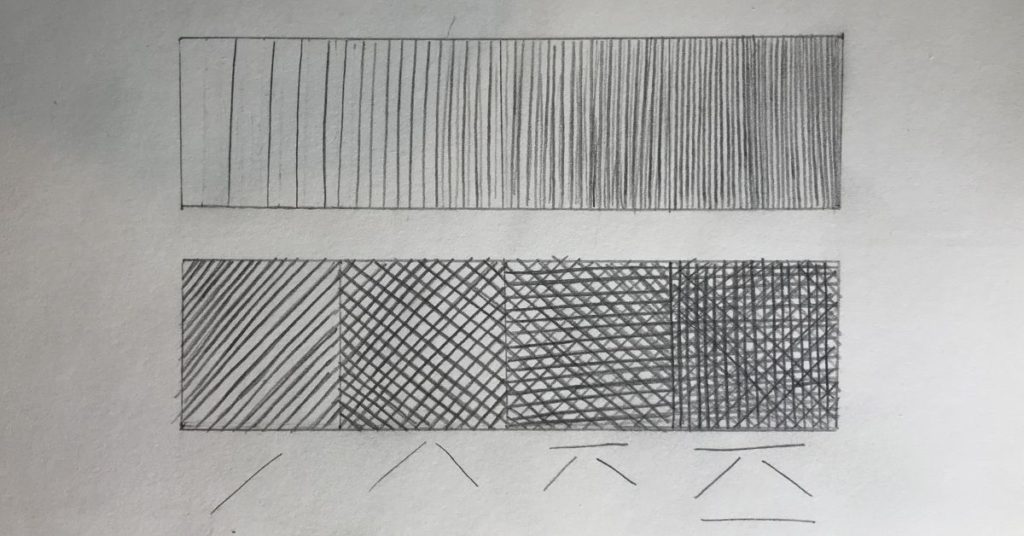
To create light and dark values to your drawings, you can modify two factors: quantity and space. For this exercise, we will draw two rows of four squares and fill them with lines like shown below:
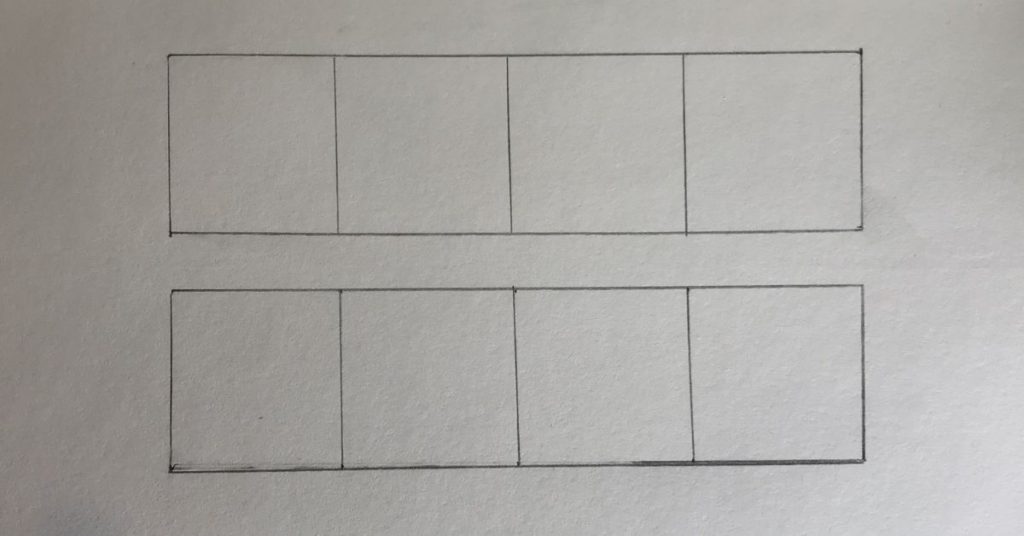
Once you have that, start adding lines and create different values. The exercise on top is based on line proximity only, so it will be the same for all the images.

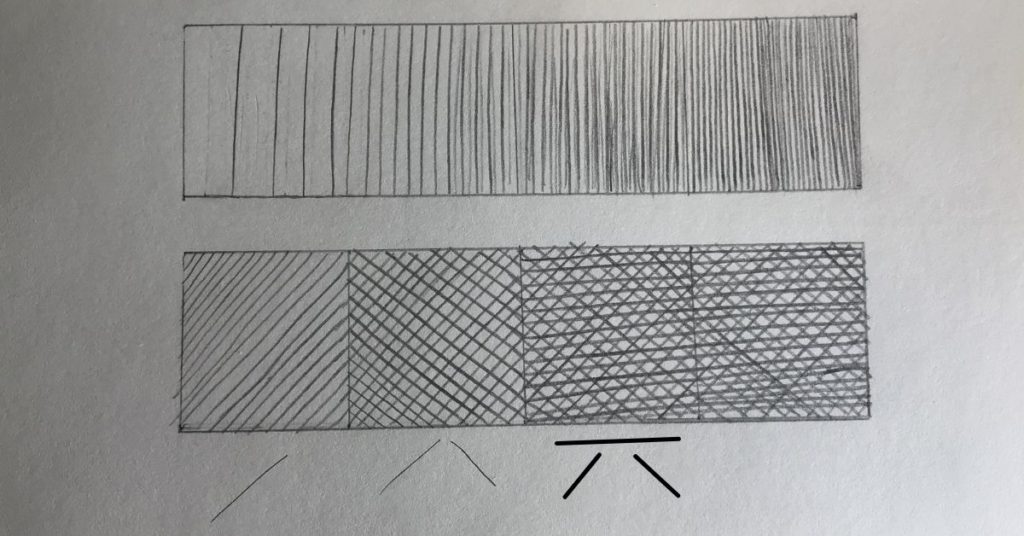
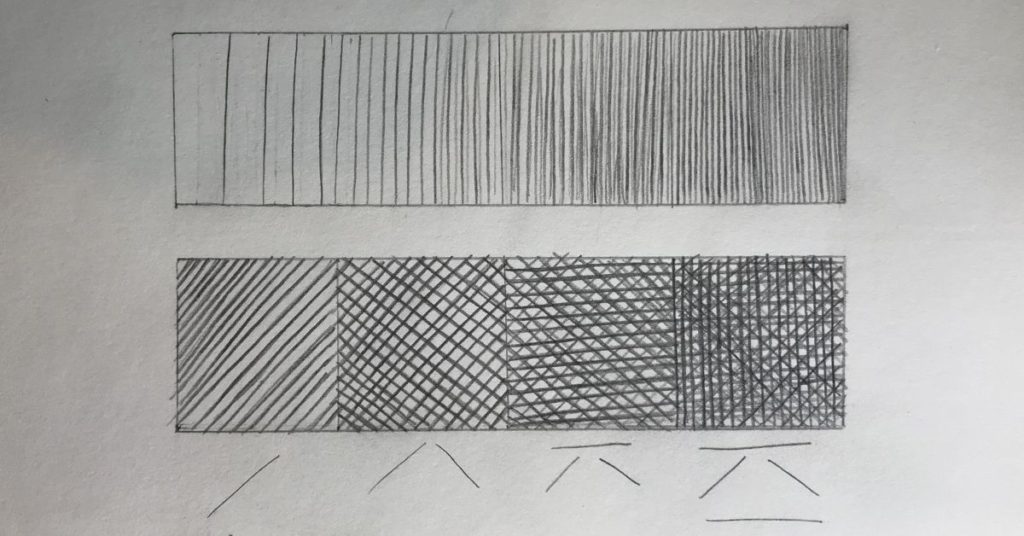
As you can see, any of the two can achieve different dark or light values. If you combine them both, you can create even greater value scales. I used an HB pencil for the exercise and didn’t apply too much force on the strokes, so if you want to get darker or lighter scales, you can change the pencil tone or apply more or less strength to your lines.
2. How to give form using crosshatching
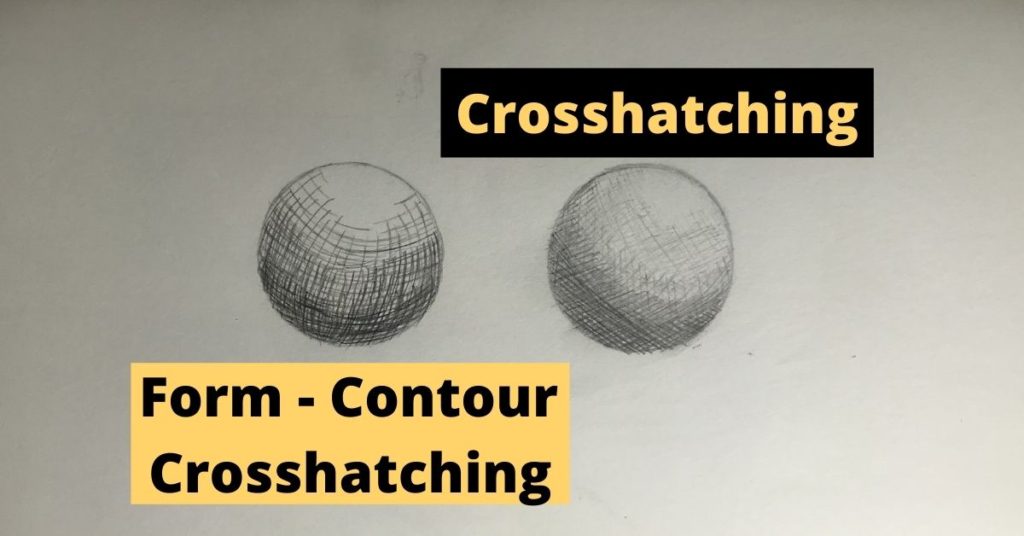
The best way to give form to your drawings using crosshatching is to add lines that follow the object’s contour. You can also do it with straight lines, but your illustration will look with more dimension and life if your lines follow the object’s shape. To do this exercise, draw two circles and add lines to them following the example below:
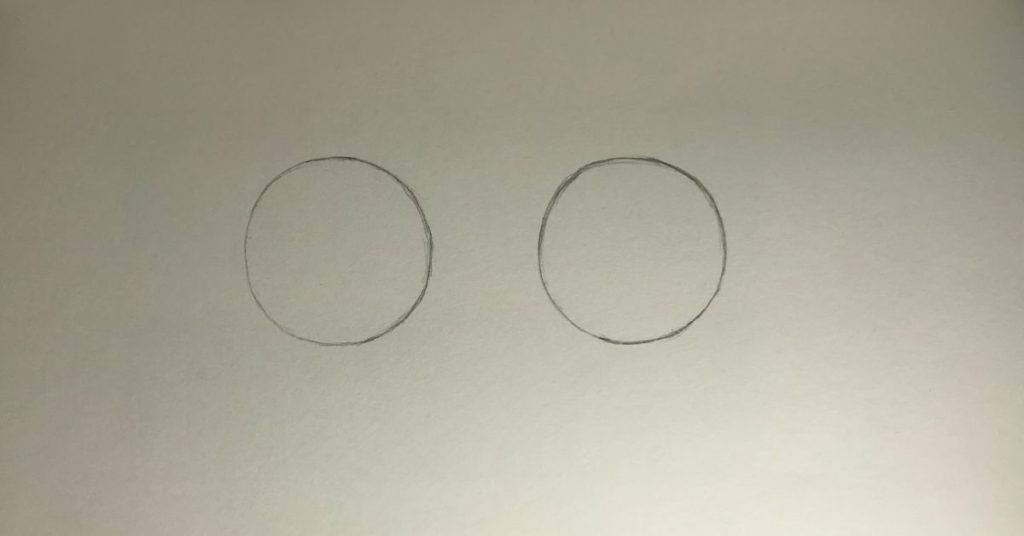
Once you have both circles, start adding lines and create different values. The circle on the left uses contour lines, and the right one uses straight lines.
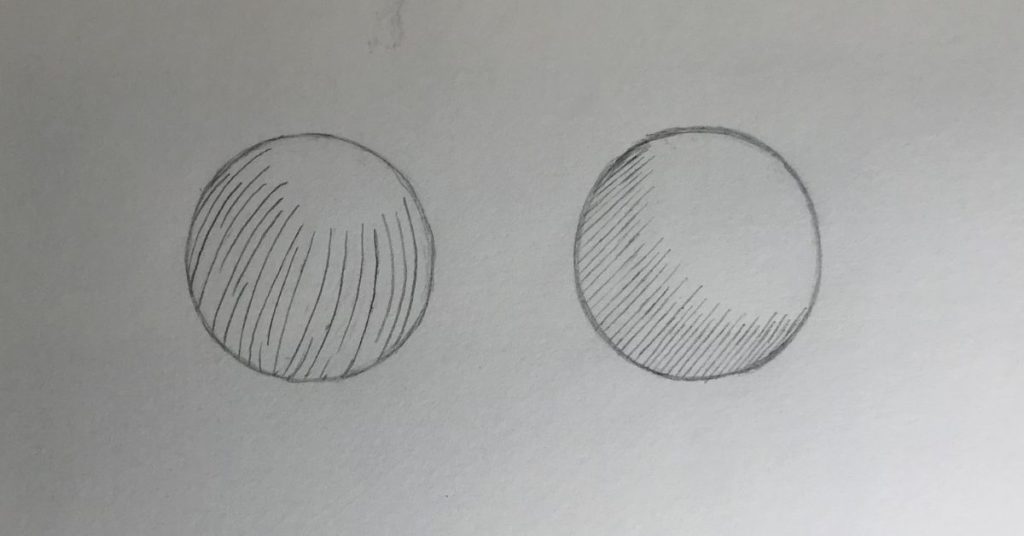
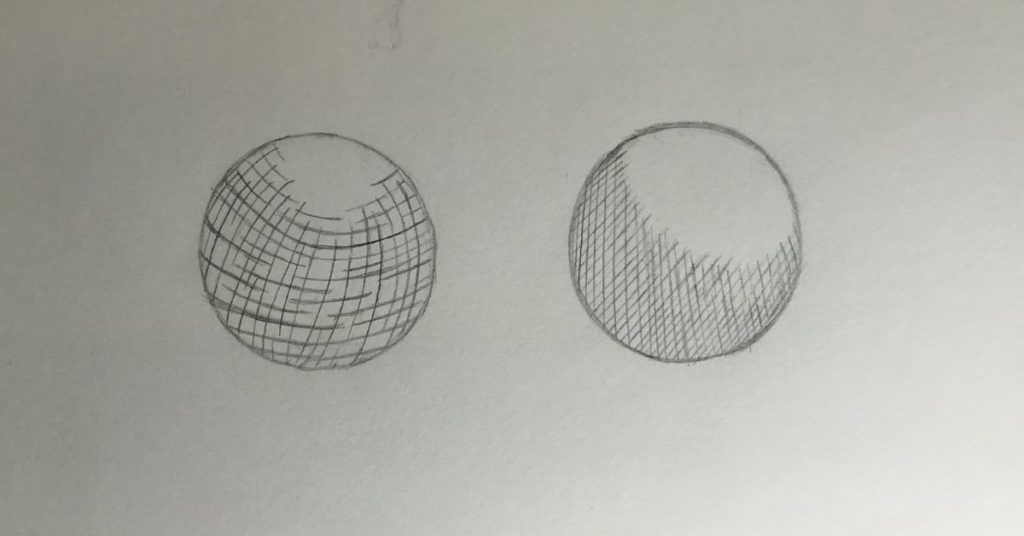
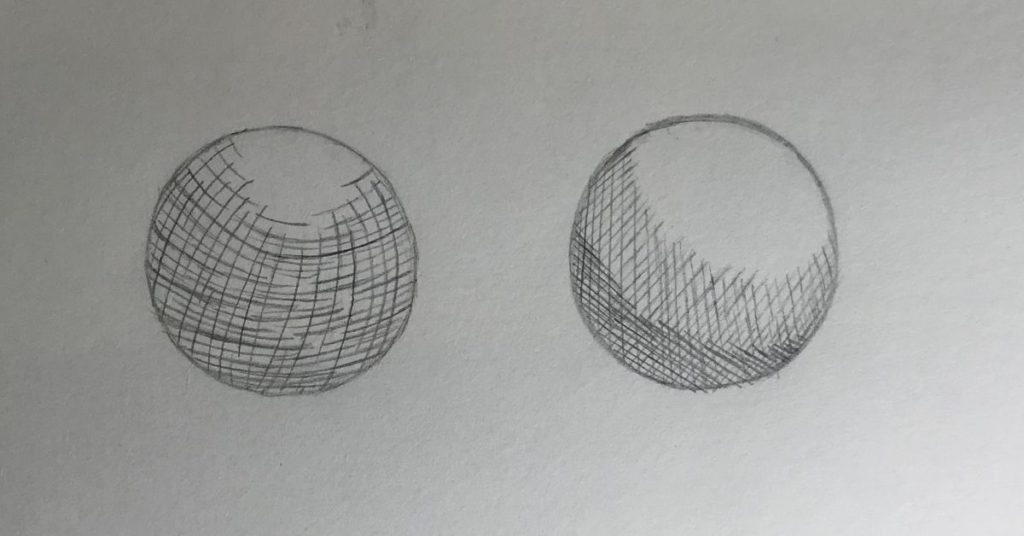
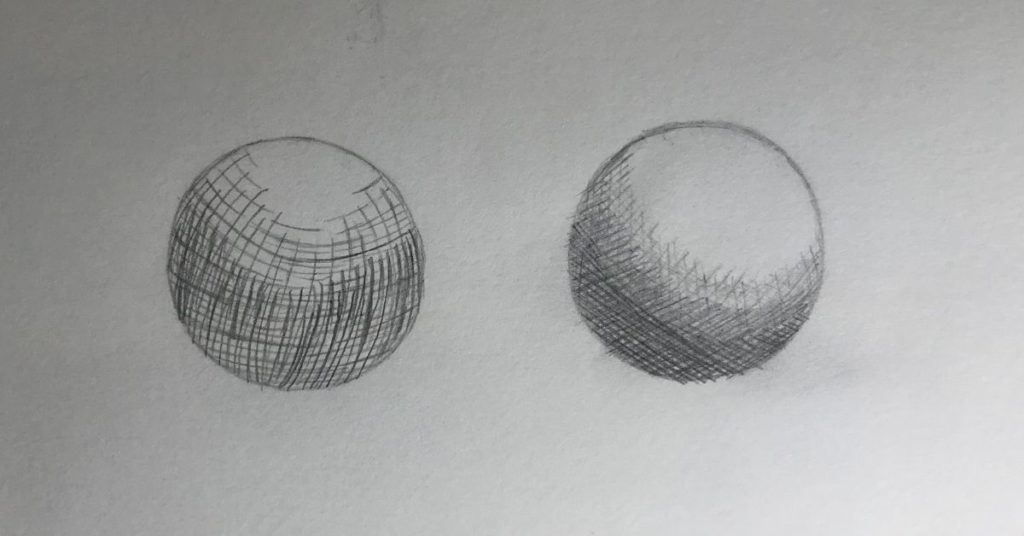
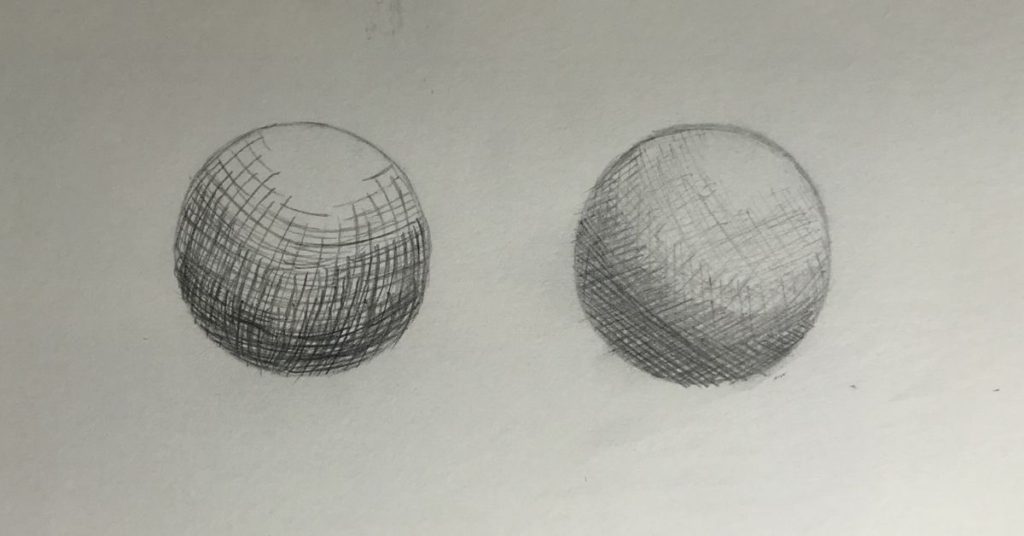
Both circles look great, in my opinion! I have a long way to go with contour crosshatching still! I prefer using curvy lines to give form, but using straight lines works perfectly as well. It all depends on the art you want to create, and any option will be great.
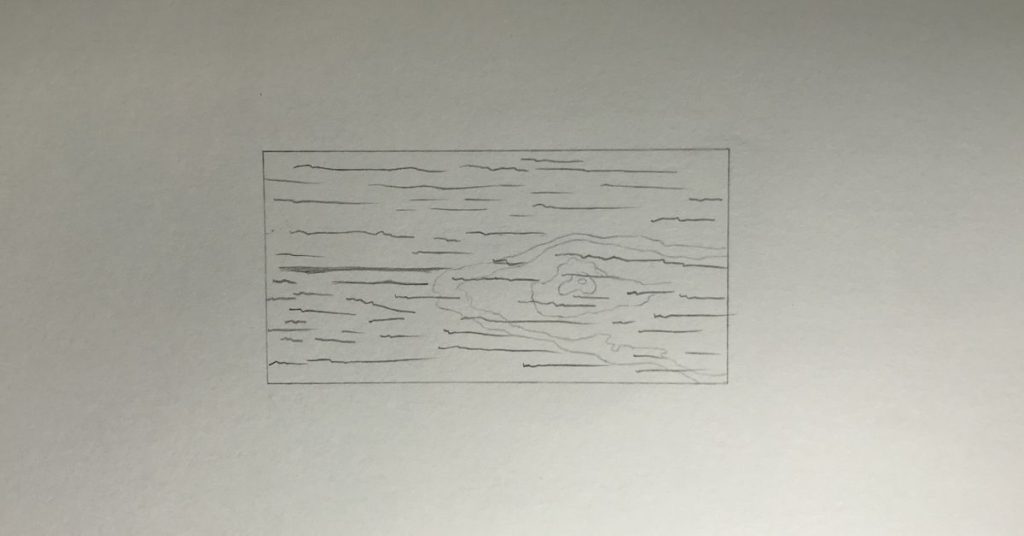
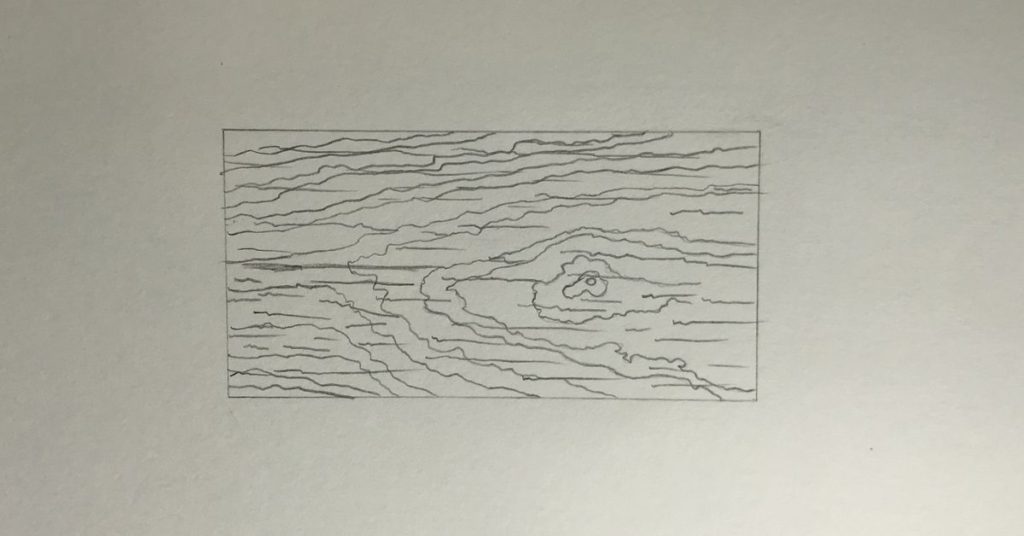
3. How to create texture with crosshatching
Hatching and crosshatching are a great way to add texture to objects or surfaces. In this case, your focus wouldn’t be adding value necessarily, but to represent how the object’s surface looks. Here’s a picture of the table I use to draw:
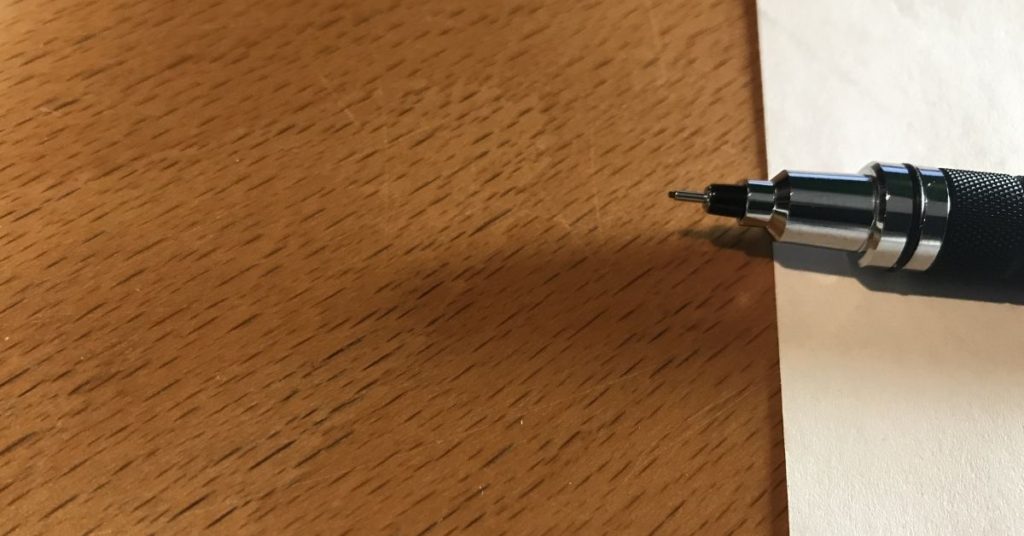
You can see it has little lines everywhere, so that’s a great example to base this next exercise. To do it, draw a rectangle and follow the example below:

Once you have the rectangle, draw “tick” lines and fill the table. Then draw some extra features to the table and fill them with parallel lines.

And that’s all you need to practice to get better at hatching and crosshatching! However, apart from these technique exercises, there are also different hatching and crosshatching styles. Below I share some of my sketches using these other crosshatching types.
What Are The Types Of Hatching And Crosshatching?
Now that you understand hatching and know how to add it to your drawings, you can also add different hatching styles to your drawings. You have already seen three of them in the examples above, but now you will their names and three other types.
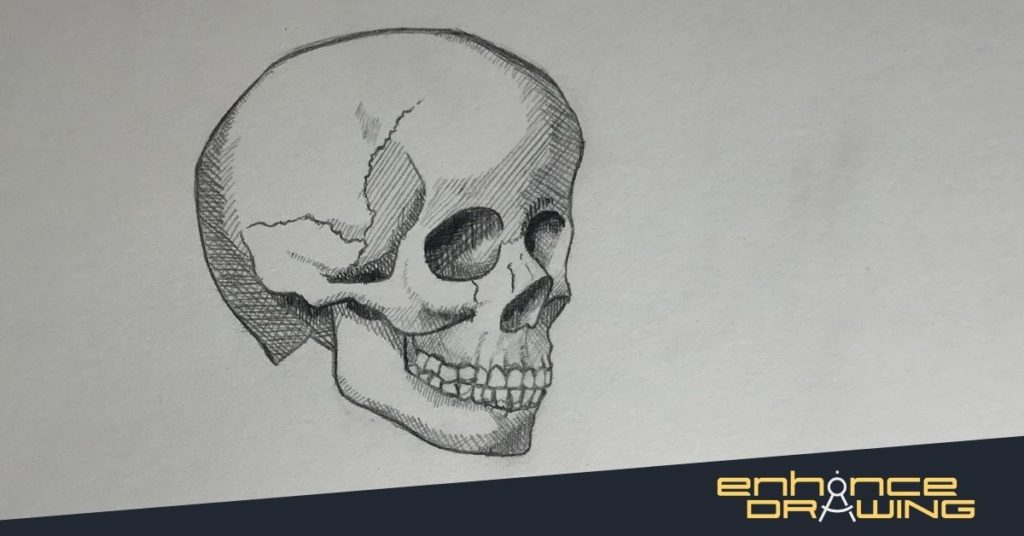
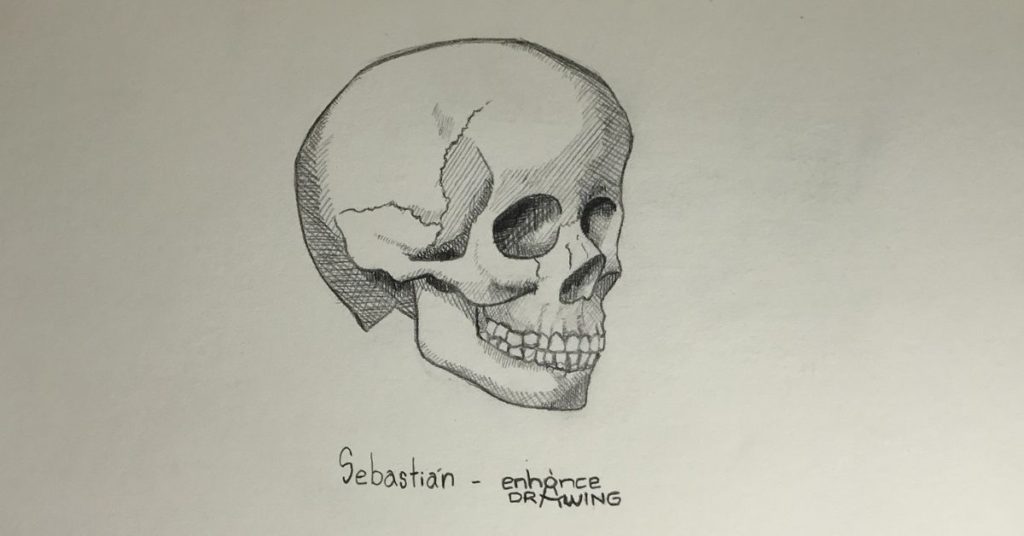
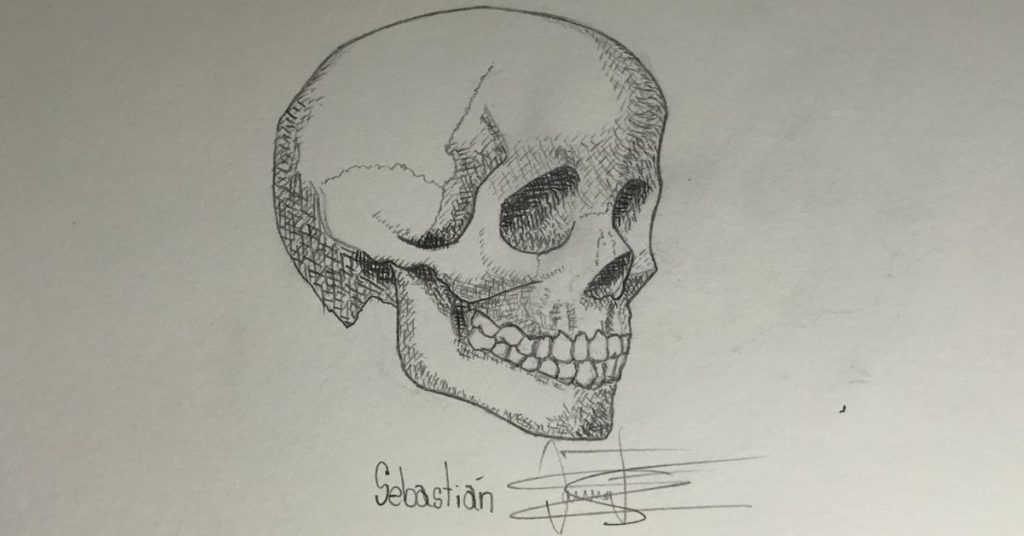
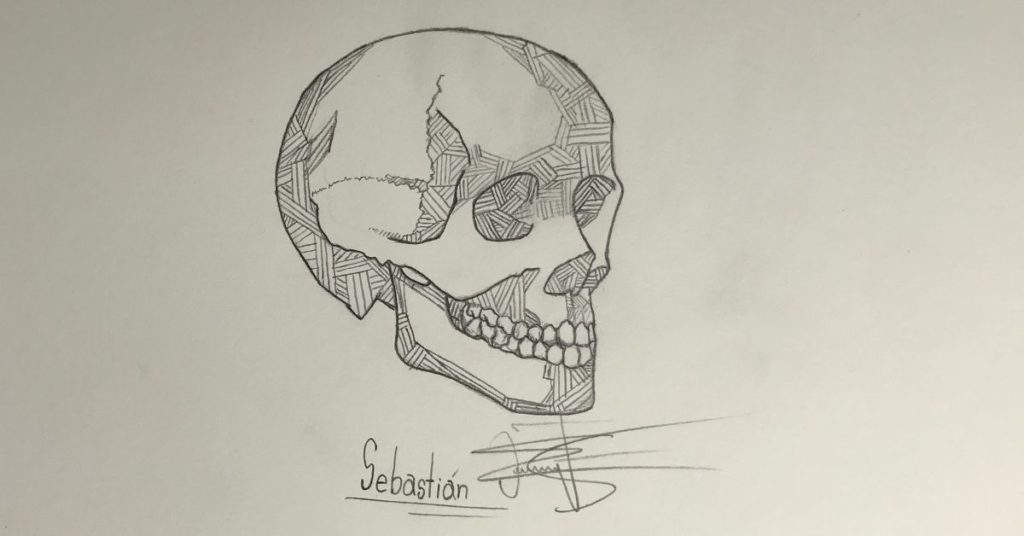
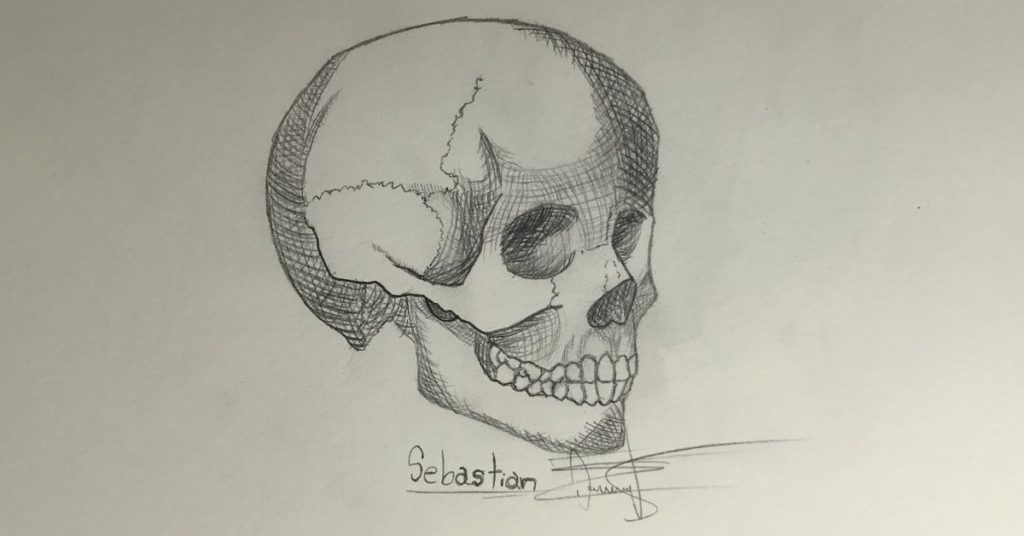
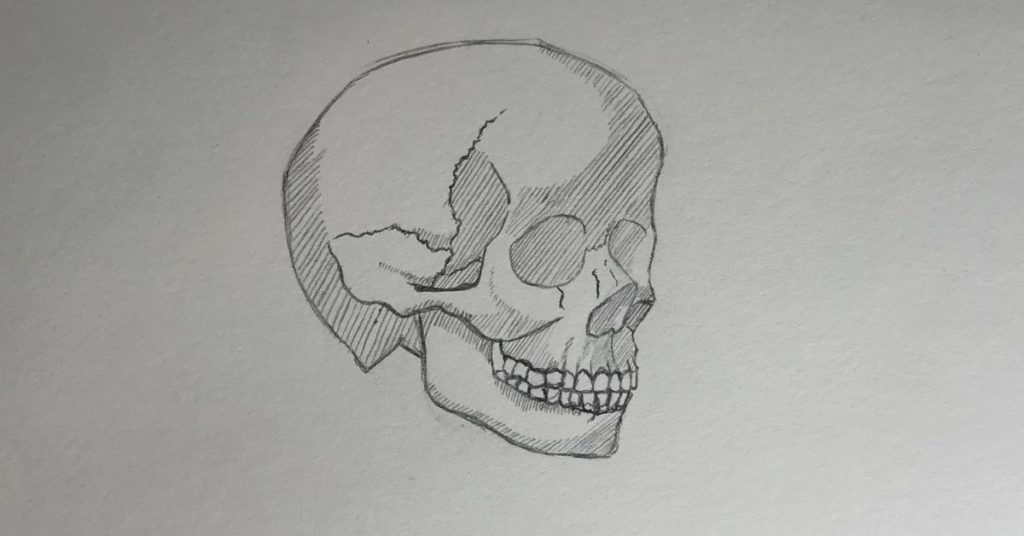
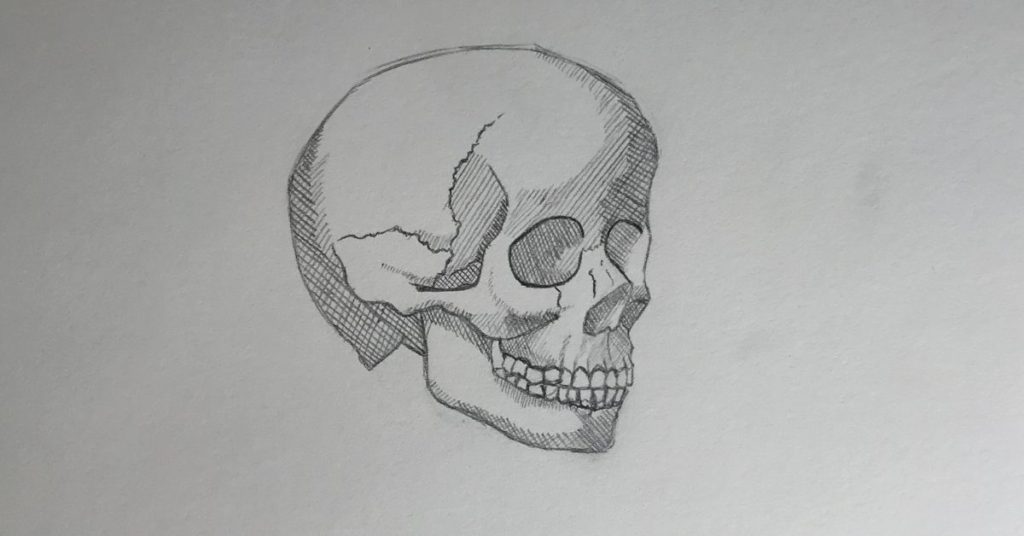
I will use skull sketches to represent each style so you can see it more properly.
1. Fine Crosshatching
The difference between crosshatching and fine crosshatching is the level of detail. When fine crosshatching we increase the number of lines and decrease the lines’ proximity to achieve a very smooth tonal transition. If you apply this technique in the right way and see your drawing from a relatively far distance, the lines could trick your eyes into thinking it is a regular pencil-shaded drawing. This illusion is most appreciated if using fine lines.
2. Tick Hatching
Up to this moment, all hatching techniques involve relatively larger than shorter lines. However, tick hatching consists of stroking very short parallel lines, which allows you to add more value in little areas. If you need to create density or a darker area, you can pile them on top of one another, without the need for crosshatching.
3. Basket Or Woven Hatching
This hatching style is a very graphic one, and it can give your drawings a very unusual but fantastic look. The technique consists of stroking sets of parallel lines in one direction, then doing the same to the adjacent sets but drawing lines in a different direction. Crosshatching is not necessary for this technique, but you can add it.
4. Contour Hatching And Crosshatching
This hatching and crosshatching type refers to the example we did when giving form to our drawings. Rather than drawing straight lines, with contour hatching, we follow the contours of the subject to add more dimension to our drawings, in addition to providing value. Contour hatching would consist of parallel lines that wouldn’t usually touch each other, and contour crosshatching would consist of parallel lines that intersect one another.
5. Parallel Hatching
Parallel hatching is the basic technique all other types are born. The primary purpose of parallel hatching is to add value (light and dark) to your drawing. Since you cannot cross lines, the factor that will control how light or dark an area looks is the lines’ proximity. The lines I use in the example are diagonal, but you can use horizontal, vertical, or any line orientation to illustrate the technique.
6. Parallel Crosshatching
For parallel crosshatching, we would first apply what we would do in parallel hatching and then add perpendicular lines intersecting the existing ones. Contrary to parallel hatching, the factors that can control value are two now: the number of lines and the lines’ proximity.
These drawings were very fun to do, but they were challenging. I always try to improve my drawing skills, so below is my approach to get better at hatching and crosshatching if you’d like to see it!
How To Get Better At Crosshatching?
Just as with any technique you want to improve at, you will need to put hours into practicing it a lot. The first step would be to identify your skill level and trace some goals.
1- If you’re entirely new to the technique, start by recreating the examples I explained at the beginning of the post and follow the instructions. Practice these exercises as much as possible until you feel like you’re getting the desired look. I would consider 30 minutes of practice every day will be enough to see progress in 5-7 days. And really good improvements in 15-20 days. Of course, if you practice for more time every day, you will reach your goals quicker. It will help if you are disciplined and organized about practicing. With the right mentality, it shouldn’t be hard but fun!
2- If you’re new to the technique but have decent experience drawing, you will probably get it quickly. Practice the exercises at the beginning of the post for at least four hours, and you’ll be able to jump into the next exercise.
3- If you already have experience crosshatching, you can jump the exercises at the beginning of the post and start applying the crosshatching technique to any drawing you like. How you will approach your practice depends on the experience you have with shading and lighting.
- If you don’t have much experience with creating shadings yourself, I suggest you get a shading reference of what you’re drawing. This way, you will have a complete, shaded drawing to look at, and your only focus will be to create the right value for each area. You can even print an outlined drawing if your goal is to improve your crosshatching as soon as possible.
- If you have enough shading experience, then just use any drawing you have and add value to it using the techniques above. I suggest you approach every crosshatching type one at a time not to miss what defines each style. Since this is an intermediate level, my recommendation would be to stick with fine crosshatching.
4- If you’re already good at crosshatching, you need to identify what else to improve in your technique. To do this, bring some drawings with crosshatching in them and use the questions below to determine what factors you excel at and what factors you don’t.
- How straight are your lines? This factor is not a mandatory one, but having the ability to draw straight lines across all your drawing will level up your crosshatching technique.
- How close can you get your lines between each other without merging them? Lines’ proximity is a huge factor to increase the tonal scale of your drawings, so see if there’s still some space for extra lines between the ones you have on your drawings.
- Do all your lines have the same tone? If you’re not using an ink pen but a pencil, it’s essential to keep in mind that lines shouldn’t be darker or lighter than each other unless that’s your intent. The two main factors that should control the value are proximity and the number of lines.
- Do all your lines have the same length? This factor is also not a mandatory one, but consistency can level up your crosshatching technique. If your lines have different lengths, but that’s what you intended, then there’s no problem. But if it wasn’t your intent, then maybe you’re not using the right tools. I will talk about the best tools for crosshatching in the next paragraph.
- What do you think you’re not getting right? After looking at the past three questions, a little bit of self-assessment is always a great way to improve. As artists, we tend to be very strict about our creations, so some ideas might pop-up if you ask yourself this question. They say you’re always your biggest critic!
So, going back to line length, here’s why you’re not (probably) getting every line to have the same length.
What Tools Are Best For Hatching And Crosshatching?
Although you can use any pencil or pen to add this technique to your drawings, using the appropriate tools can improve how your crosshatching looks. Our goal is to achieve line consistency, and the two main factors that control how consistent they look are tone and length.
Length: One problem we artists face when drawing lines that have the same length is that every time we use our pencil, the lead flattens and becomes slanted, creating variations between strokes, so we tend to turn our pencils over and over to use the sharp point. This way to solve the problem is anything but efficient, but you can quickly solve it using a good mechanical pencil. In fact, there’s a perfect mechanical pencil that has an automatic lead-rotating technology that turns the lead every time the tip touches the paper. I have an in-depth review of this mechanical pencil you can check by clicking this link!
Tone: Although you can achieve the same graphite tone by improving your drawing skills in general, if you use an ink pen, that problem will be out of the way. I don’t yet use ink pens myself, so I don’t have any recommendations I can give you right away, but I’m sure there are plenty of good options out there you can check out.
Why Do Artists Use Hatching and Crosshatching?
Hatching and crosshatching was a solution many artists had when not drawing with a pencil or a tool that allowed smooth tonal transitions. With a regular 2b pencil, you can get a big tonal scale, but there’s not much you can do if you use an ink pen. Artists developed this technique to give their drawings value, form, and texture regardless of the tool they were using. However, after the method started to be more popular and more artists were using it, many artists began using it for pencil drawings due to its uniqueness.
I see it as a fantastic tool to understand shading. It looks like traditional shading might be easier to achieve at first sight, but the reality is that the factors that control a smooth tonal transition are very delicate. A little more strength than necessary can damage it a lot. Without talking about how precise you need to be. But with crosshatching, you just need to focus on the area you want to be darker or lighter and play with the number of lines you add. Preciseness doesn’t play a significant role here because what you’re creating is mostly an illusion.
On the other hand, crosshatching is an excellent practice to improve your line control and quality. If you practice this technique enough, you will notice how you will be able to control your strokes better over time. And when you go back to practicing traditional shading again, you will have so much more in-depth knowledge about it that you won’t believe it.