One fascinating thing about art is the number of techniques artists can choose from to develop their craft. Stippling is one of these techniques, and it can make your drawings look so unique I think every artist should know about it. So what is stippling?
In art, stippling refers to the process of drawing or painting numerous small dots to simulate different degrees of solidity or shading in a drawing. The closer the dots are to each other, the darker and more solid the area becomes. In stippling, all dots must have the same color.
This article will guide you through stippling examples, exercises to get started with it, tips and the best materials to practice it.
What Is Stippling In Art History?
Stippling is an artistic technique that replaces traditional shading with dots that create the same illusion. The theory behind this technique is to play with empty spaces to trick your brain into thinking one area is lighter than another one. This illusion is stronger the farther you’re from the drawing.
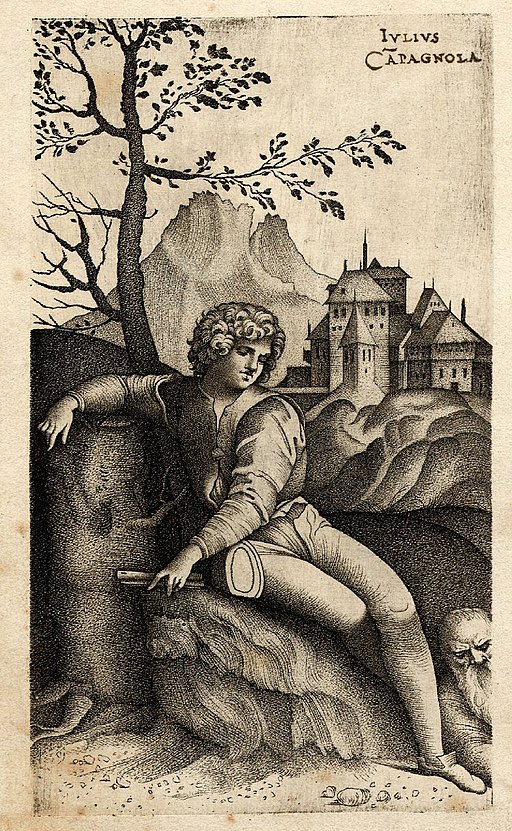
The fascinating drawing on the left was drawn by Giulio Campagnola, the artist who created the artistic stippling technique during the renaissance period in 1510. And although he developed this technique for printmaking originally, it became a fundamental drawing technique that is still very popular and practiced today. In the renaissance, printing could only use one color, so this technique allowed prints to indicate depth, solidity, and value.
Why Do Artists Use Stippling?
Artists use stippling for basically the same reason printing did back then. Stippling is a solution for artists that use drawing tools that don’t allow smooth tonal transitions, like ink pens. Since many drawing artists use ink pens for their drawings, indicating light and dark tones in an illustration is almost impossible.
In contrast to pencils, ink pens can only deliver one dark tone, but stippling allows artists to achieve nearly the same range of tones they would achieve with a pencil. As you saw in the example image, the dots create all the shading in the drawing. They all have the same black color, and the only thing that makes it look like some areas are lighter than others is the distance between each dot. To show you some examples of how stippling looks like and how you can achieve many different tones, see the images below!
Stippling Examples
To make sure you understand each stippling aspect correctly, I will show you examples of it from its most basic forms to more complex ones. We will see how value, depth, and texture look like when stippling. Let’s start with value (light and dark tones).
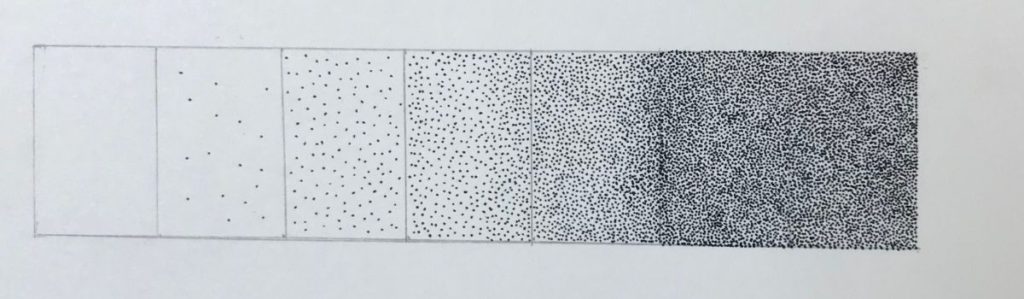
Shades And Value In Stippling
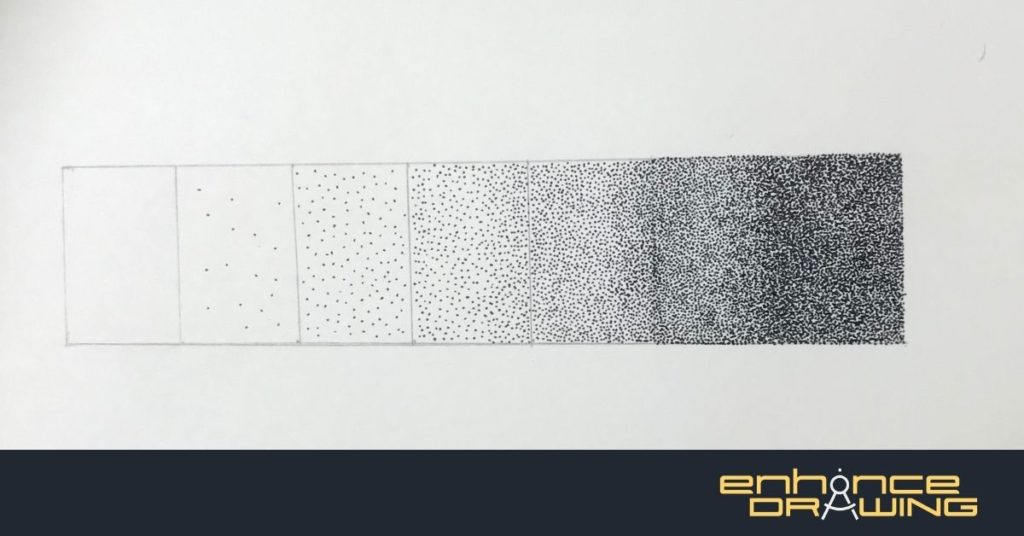
As you can see in the example above, stippling is a very useful technique to achieve many different tonalities. The closer you draw dots to each other, the darker the area will be, and vice versa. It might not be the most effective one because of the time it takes to complete it, but the smooth tonal transitions you can achieve with it are entirely worth it. Stippling was one of the most helpful drawing techniques that made me understand shading better.
Form And Depth In Stippling
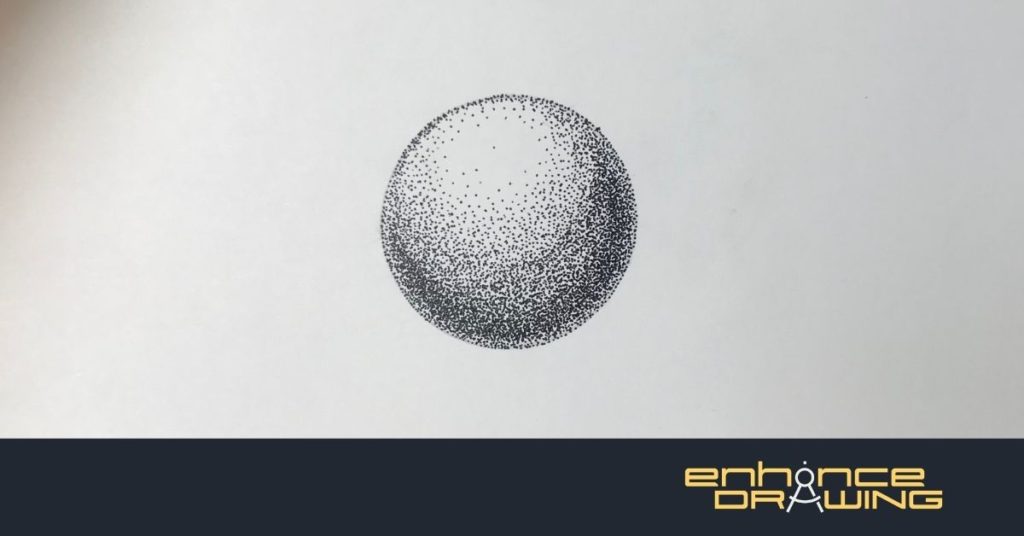
Another aspect stippling can enhance in your drawing is the creation of depth. In the example above, you can see how both the dot’s distance and alignment create the illusion of form and depth. The visual illusion stippling creates in the circle makes you think about it as a three-dimensional object even though it is on a flat surface. Traditional shading and many other drawing techniques can also achieve this look, but there’s something about stippling that makes it look complete compared to other shading techniques.
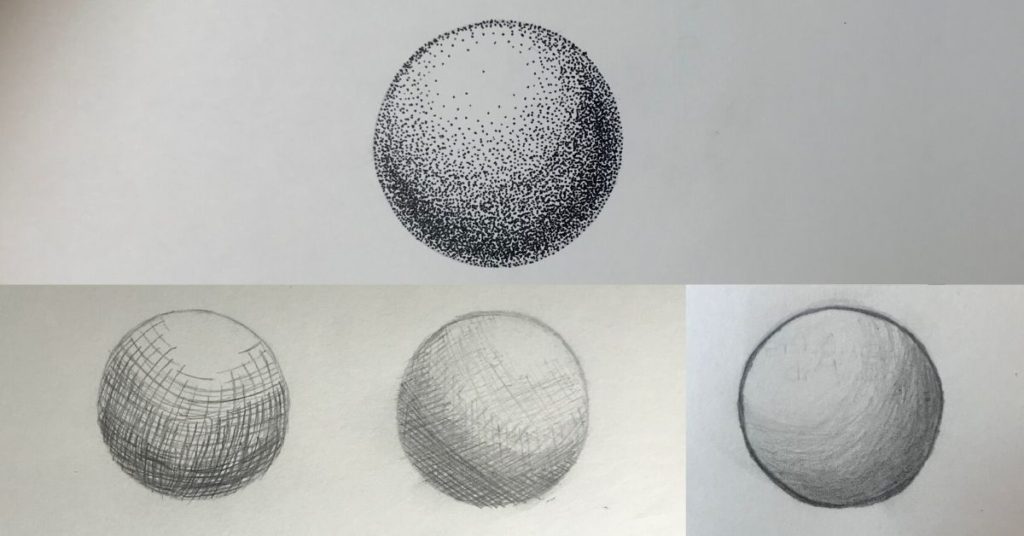
All the other shading techniques are indeed incredible, but stippling makes it simpler to achieve smooth tonal transitions. Of course, this is always personal, and results will vary depending on your skill.
Stippling In Different Drawings
You can create unique pieces of art by stippling your drawings. Here are some drawings I did recently.
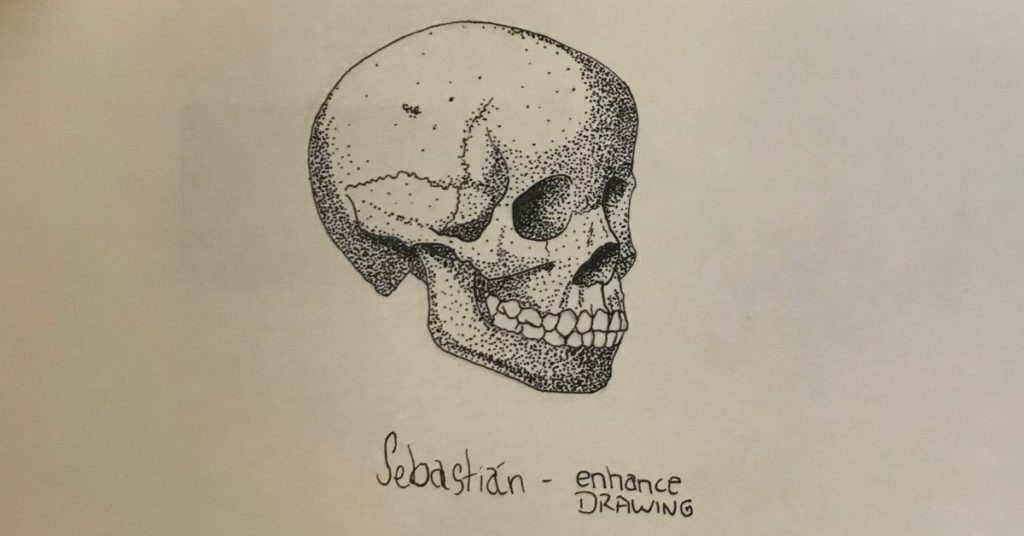
Skulls usually have flat, smooth surfaces, so stippling is somewhat easier to apply in a drawing like that one. The tonal transitions are amazing, and it is easy to be consistent throughout the whole drawing.
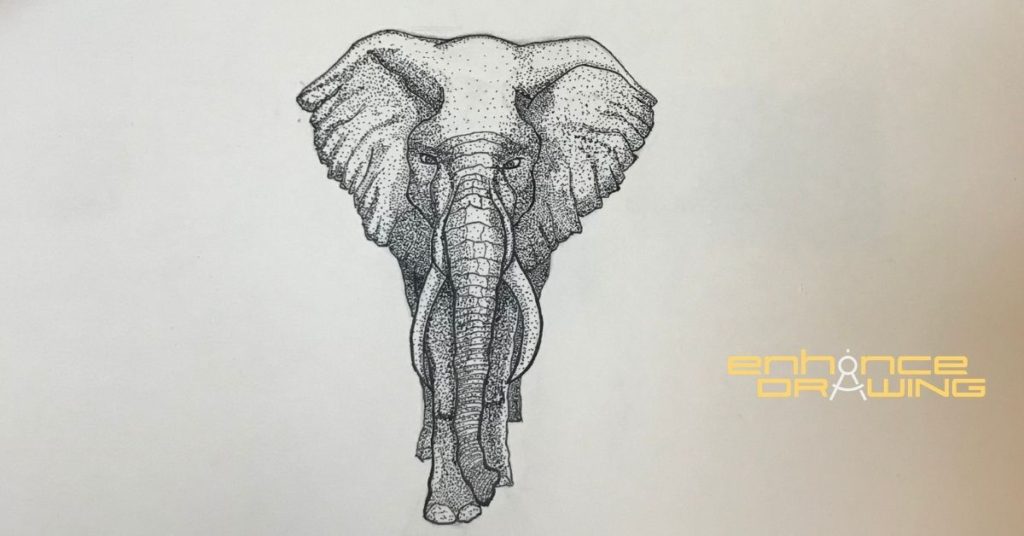
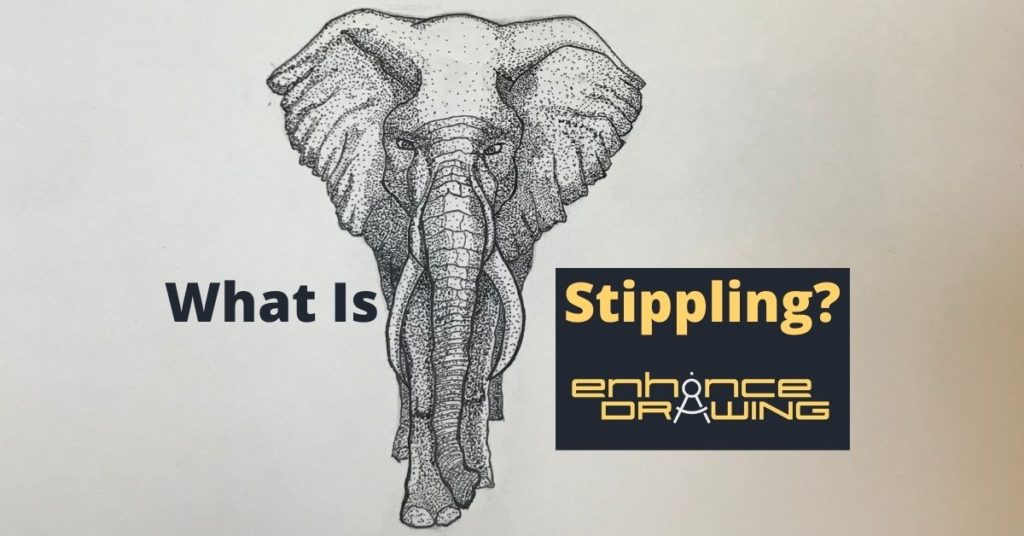
This drawing was tougher to stipple because of the elephant’s skin texture. But the look it has is so unique it was worth the time.
As you could see in the drawings, stippling is a very versatile shading technique, but just as with any drawing skill, learning how to stipple correctly takes time and practice. Below I will give you the basics so that you can get started with stippling.
How To Stipple – Stippling Exercises
As we already know, all we need to do to stipple is to draw thousands of dots throughout a drawing to suggest light, form, and depth. We will start this by recreating the examples you saw above for value and shadow. To get familiar with the technique, we will first stipple them in an introductory way and then increase the level using the same subjects.
Tip #1: Stippling looks a lot better when using ink pens than when using graphite pencils. But you can use graphite pencils to practice these exercises if you don’t have any ink pen (any ink pen would work, no matter how cheap it is). The ink pens I will be using to stipple are the Pigma Microns, which I’ll review in detail after the exercises.
How To Create Value With Stippling
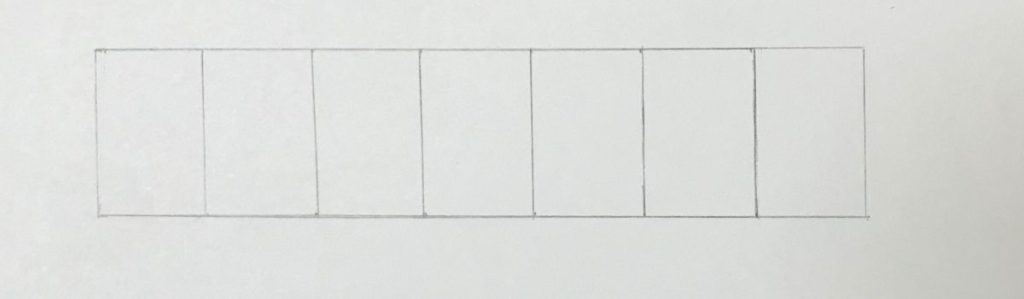
The first thing you need to start this exercise is to draw a row of four squares. You can do them using a ruler. Once you have that, follow the steps below.
Step 1
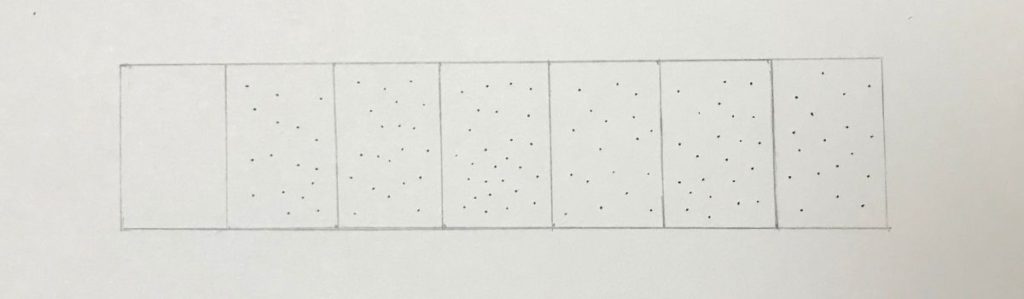
Starting from square #2 to square #7, take your ink pen or pencil and draw dots distanced from each other.
Step 2
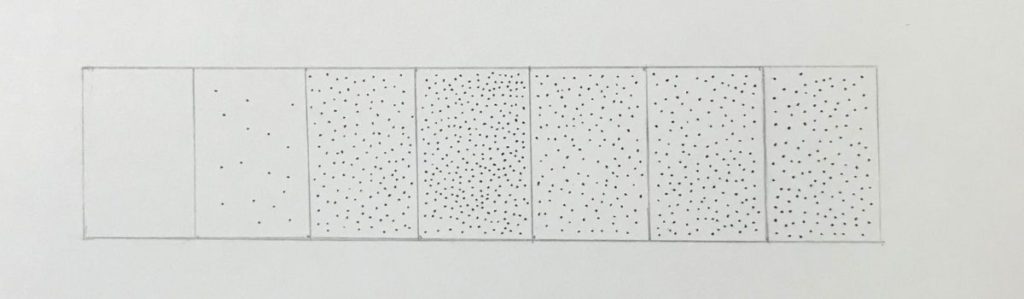
Starting from square #3 to square #7, start filling in the empty spaces with more dots. Make sure the dots are not very close to each other yet because this is just the second darkest value in the exercise.
Step 3
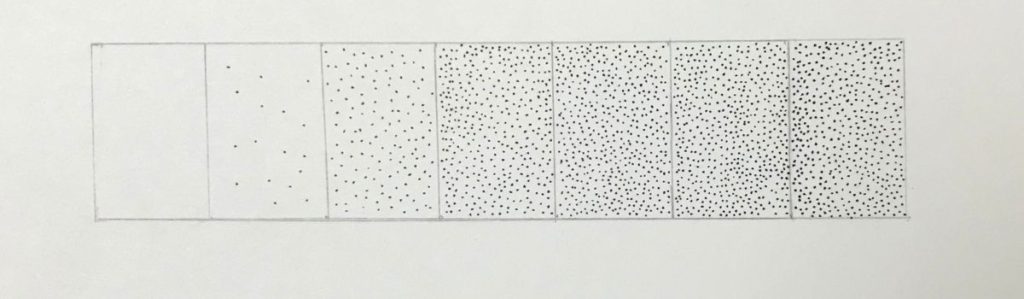
Starting from square #4 to square #7, fill the empty spaces even more. Make sure there’s still space to draw more dots for the final step.
Step 4
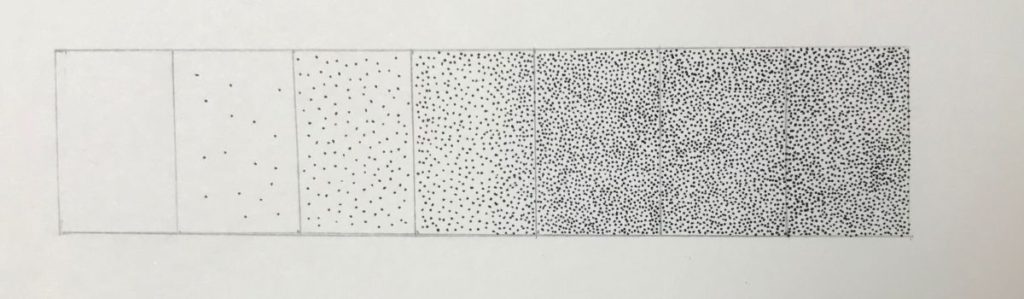
Starting from square #5 to #7, continue filling the empty spaces until you feel it is darker than square #4.
Step 5
You’re almost there! Continue filling empty spaces from square #6 to #7. Make sure you’re leaving some space to darken up the last square later!
Step 6
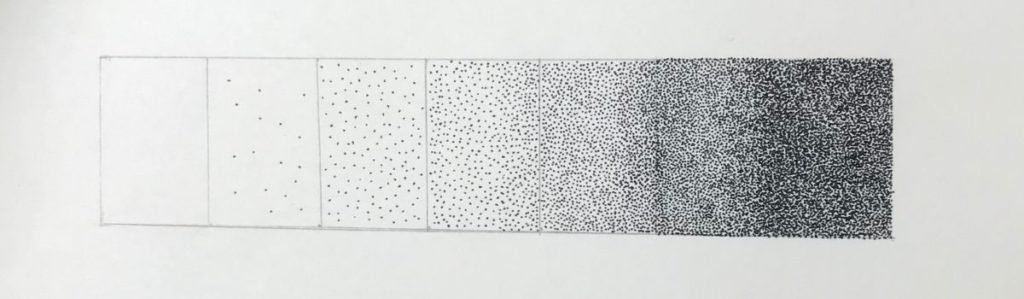
Last square, and you’re finished! Fill the empty spaces of square #7 until you feel it is darker than square #6. And there you go, a nice-looking value scale using dots.
Tip #2: Stippling can hurt your hand due to the repeated movements this technique requires. Make sure you take breaks every so often. Usually, I would stipple for 30-60 seconds and then take a 15-20 seconds break to rest my hand. I’ve found this very useful for two main reasons:
1- My hand doesn’t feel numb, and I can stipple for hours without a problem.
2- I don’t lose track of the bigger picture. It’s easy to get lost in small sections, but every time I take a quick break, I also take a quick look at the drawing and see if there is anything I need to adjust or correct before it’s too late.
How To Create Depth And Form With Stippling

The first thing you need to start this exercise is to draw a circle. You can do it using a compass. Once you have that, follow the steps below.
Step 1

Draw some distanced dots across the circle until you have something like the image above.
Step 2

Decide where the light is coming from to determine what areas will be lighter or darker and draw dots accordingly. It should look something like the image above.
Step 3

Determine your circle’s darkest area and fill it with dots almost without distance between each other. Keep in mind that the darkest area is usually not the bottom edge but the curvature right before it. This happens because the light bounces back and ends up lighting the bottom a little bit. You can see the bottom edge is a little lighter curvature above it.
Step 4

Based on your darkest area, start filling the empty spaces with dots to create a smooth tonal transition. To do it, make sure the distance between the dots is bigger the more you go away from the darkest point.
Step 5
Identify what areas could darken up a little more draw dots accordingly. One great thing you can do to identify these areas is to look at your drawing from afar. If you add more dots, your circle could look something like this.

And there you have it! You can continue enhancing the tonal transitions by adding more dots if you want, but what you did up to this point is enough to practice and get used to the technique.
Tip #3: Don’t rush it. The beauty of stippling is the process. You can tell when an artist rushes stippling because the dots’ quality decreases, and they start looking smudgy or like little lines. Don’t start a stippling project if you’re in a rush; the results won’t be as good as they can be if done carefully. Let yourself enjoy the process!
How To Stipple Faster
When I say don’t rush it, I’m not saying you cannot stipple faster. There are ways you can speed up this process without losing the quality of your dots. The two main factors that can affect how quickly you stipple are the technique and materials you use.
Technique: You will improve your technique the more you stipple. One of the things that make it slow in the beginning is precision, but if you practice this regularly, you will be able to do it faster. Here’s a simple exercise to improve your accuracy when stippling.
Materials: If you use a graphite pencil to stipple, the process won’t be as fast as it could be. Instead, if you use an ink pen to stipple, not only will the be process be faster, it will also look a lot better. Don’t worry if you don’t have any professional, expensive ink pen or something like that; you really just need a regular ink pen to stipple. Of course, if you use a tool that is specific to the technique, that always helps.
One stippling tool worth mentioning is the automatic stippling pen, which does most of the work for you, but I wouldn’t consider what this tool does stippling but something else entirely. Plus, it is a bit expensive to buy and to maintain. Here’s a link to amazon in case you want to see the automatic stippling pen.
Now that we know almost everything about stippling, let’s see what materials you would need to use in a more informative manner.
Materials You Need For Stippling
The #1 pick for stippling is an ink pen. Ink pens can help you achieve consistency throughout the drawing and draw each dot with the least effort. The ink pens I recommend the most for stippling and general outlining are the Pigma Microns ink pens (link to amazon). Their line quality is fantastic, and their price is affordable. Here’s a picture of how microns’ lines and dots look like on paper.
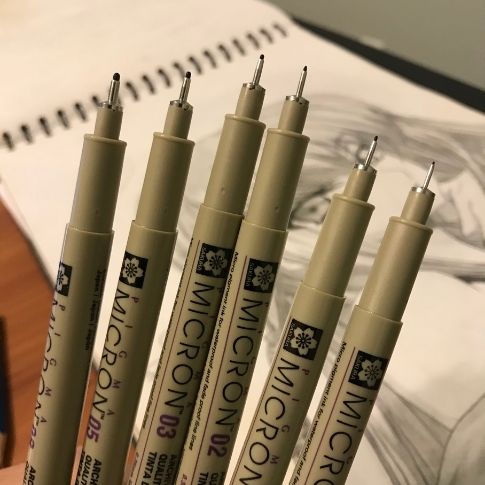
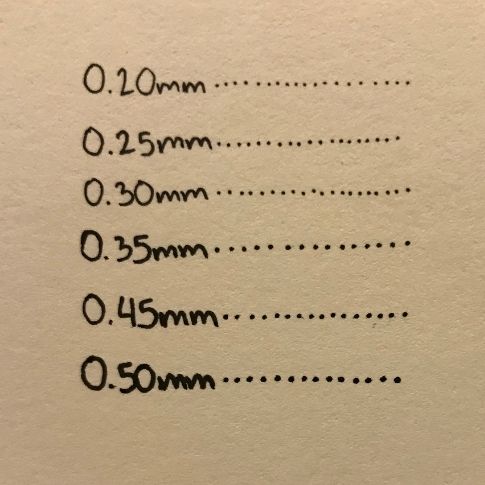
I love microns because they come in many different lead sizes, letting you add more line variety to your drawings and make them look unique.
Other Materials That Also Work For Stippling
Any ballpoint pen: Results won’t be the same, but I’ve seen many artists create beautiful art pieces by using ballpoint pens only. I’m 99% percent sure there’s an ink pen in your house at this moment. Look for it and start stippling with it. And if you fall in love with the technique, consider buying a more advanced tool for stippling!
Any graphite pencil and sharpener: The only issue I’ve found when using graphite pencils to stipple is that finishing the process takes way longer, and the dots don’t look as consistent as they would with an ink pen. Remember that if you want to give it a go with a pencil, you might need to sharpen it regularly as you stipple.
Any mechanical pencil: Mechanical pencils would be a better fit for stippling because you don’t need to sharpen them as you stipple. However, tone consistency and speed are still an issue here. If you don’t yet have a drawing mechanical pencil, here’s a great article I wrote about them to help you decide which one is best for you!
Regular paper: I would avoid stippling on laminated papers as these don’t absorb ink or graphite very well, and your dots or lines, in general, would look smudgy. Instead, any regular paper you would find in a notebook. Of course, drawing paper would be the best fit for stippling or any drawing in general.
Tip #4: Although I recommend some tools over others, please don’t think you cannot stipple using any drawing tool. To get started, all you need is paper and something that can make marks on it. How great an art piece looks is more related to the artist’s technique than the tools he’s using.
Frequent Questions About Stippling
If you still have some extra questions about stippling, here are the three most common questions I get about stippling!
What’s the difference between stippling and pointillism?
The main difference between stippling and pointillism is that stippling is a monochromatic technique that consists of drawing multiple dots in one color only, usually black. In contrast, pointillism uses a lot of different colors to create a picture.
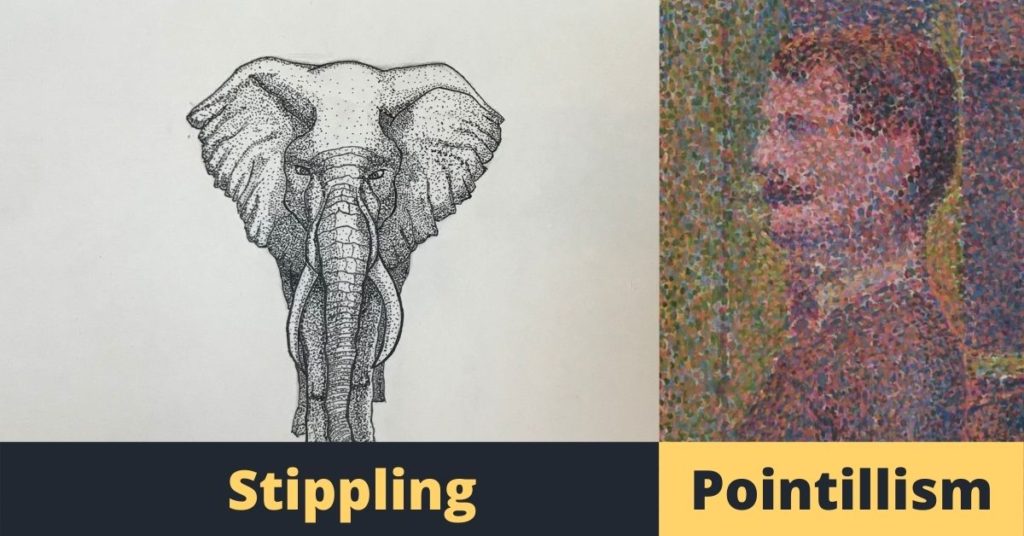
As you can see in the comparison of both techniques, stippling uses much smaller dots than pointillism. Also, stippling is an artistic technique from the 16th century, while pointillism is an artistic technique that first appeared in the 19th century and was influenced by stippling.
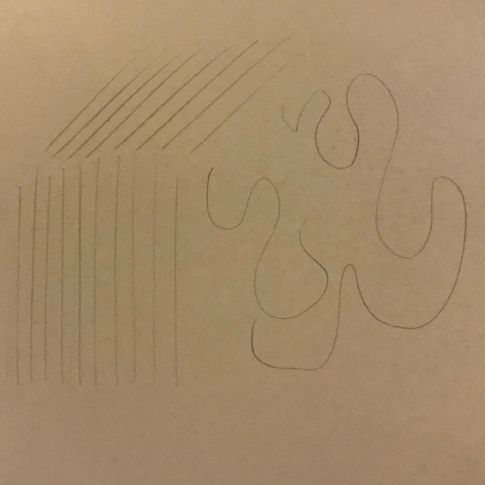
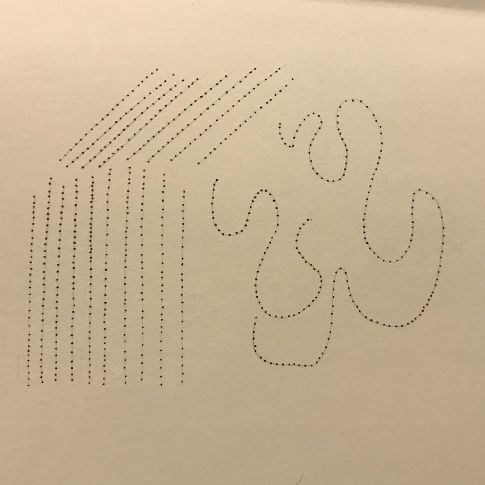
What’s The Difference Between Stippling And Crosshatching?
The main difference between stippling and crosshatching is that stippling uses dots to shade a drawing, while crosshatching uses lines to shade them. Another difference between both techniques is that it is much faster to crosshatch a drawing than to stipple it.
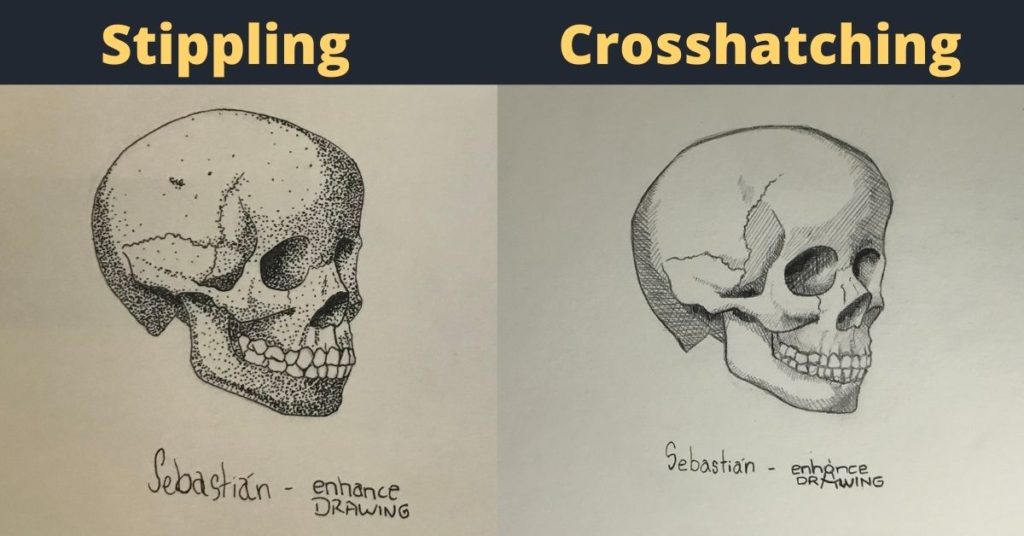
As you can see in the image, stippling consists of dots only, while crosshatching consists of lines only.
Is Stippling An Element Of Art?
Stippling is most of a drawing technique than an element of art. Value is the element of art stippling is part of (light and dark in a drawing). With stippling, you can draw the illusion of depth, solidity, and light, which are the same factors that value controls in an illustration.
So, in other words, stippling is not an element of art, but you can simulate “value” with it.
I hope this article was helpful to you, and I hope you have fun stippling your drawings, which is the most important thing in the end.
Happy drawing!